Schedule a Free Call
Category

Efficient Spaces Blog

Help for your Kitchen: Ideas to Use Now

Does your kitchen need help?

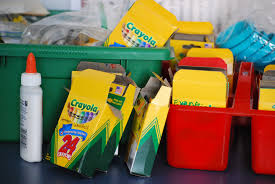
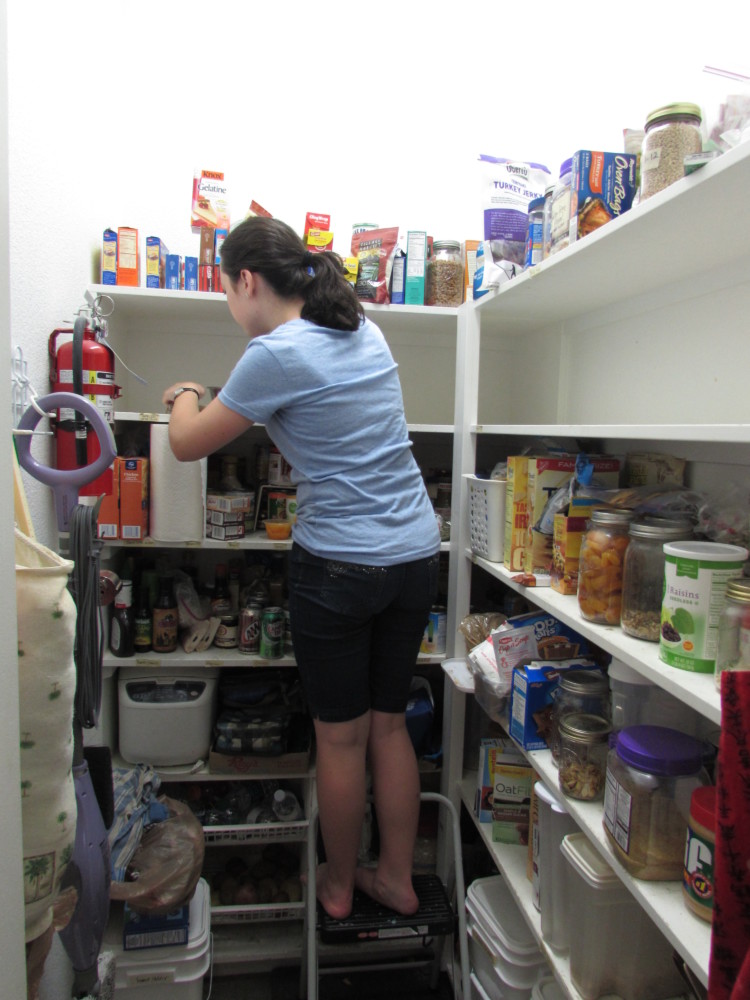
Not a helper to chop veggies or a sous chef—I’m talking organizational help. Looking for kitchen ideas? You’re not alone. In the past couple weeks, several friends have mentioned their kitchen needs work. Well, that’s what I DO, so I’m here to help in the kitchen. Think about the issues in your kitchen. What piles up, and where? Are your cabinets crammed with precarious stacks of bowls, pots and pans, and airtight containers?

As I see it, people have two storage challenges with their kitchen. One, it’s a small kitchen and there isn’t enough space.

OR It’s spread out and has many cabinets, so time is wasted looking for things.

Many people have a small kitchen that doesn’t seem to have enough storage. Apartments, starter homes, and older homes tend to have small kitchens with woefully inadequate cabinet space. In my very first kitchen, I could barely open the oven without hitting our small table! At that time, I did not have many dishes or tools, so it wasn’t an issue.

When I moved into my current house, I had the opposite challenge: too many cabinets. Imagine! After I unpacked my entire kitchen, I discovered I still had a double cabinet standing empty on the fringes. This is a good ‘problem’ to have. I ended up putting clear containers for the kids’ school keepers and art there.

With either situation, here is the best solution: establish a ‘home’ for everything in your kitchen.

Find a safe ‘HOME’ for kitchen stuff.

Appliances, dishes and tools can be tricky.

Ask yourself:

  1. Where am I going to use this item? Take the manual food chopper, for example. I love this tool and use it to chop onions often. But it is an odd size. It doesn’t fit in my large utensil drawer and I don’t want it in with my glasses and mugs. I needed it accessible, so I put it on an open corner shelf meant for knick-knacks near the kitchen sink. It makes sense because I generally chop onions about 1 step away from where it is stored. And as a bonus, the kids—who I regularly assign to chop onions—can see it, so they always put it back in the right place.
  2. How often am I going to use this item? A vegetable peeler needs to be handy, within arms’ length of where you use it, whereas a party platter can ‘live’ far from the hub of the kitchen, in one of the ‘fringe’ cupboards or a hard-to-reach area.
  3. Is this a seasonal item? Some things mainly get used in the summer or the winter. I hardly use my blender in the winter, for example, because I have a food processor and a stand mixer. So I put it away in the winter. Items used for summer parties, like popsicle molds, plastic platters and water-dispensing pitchers get put up high during the winter months. With a small kitchen, these items can be boxed in a clear plastic tote, labeled, and put in the garage or basement until their season arrives.

Eliminate these 5 easy tosses:

  1. Airtight food containers with no lids.
  2. Pots and pans or any item that you’ve replaced, holding onto the old one ‘just in case’ or for camping. Hint: Put it with camping stuff!
  3. Any appliance taking up space on the counter that you rarely use.
  4. Duplicates:  Like platters, large bowls, pitchers.
  5. Any item that is cracked or damaged.

Small kitchen storage ideas

If your stuff is overflowing with dishes, tools and appliances, it’s time to purge. Here is some advice.

First:  Take a hard look at what you have.

Do you use this? Is it really worth the space it’s using up? Is there an appliance you keep because you USED to us it, or one received as a wedding gift and feel guilty giving it away? Let it GO!

Second: Purge the items you don’t use or love.

Take them out of the kitchen. Put them into the garage or, better yet, the trunk of the car to get donated. Place them as close to their ultimate destination as possible.

Third: Put like with like.

Put all the small lids (ex.: canning jar lids) together in a small drawer or container. All airtight food containers go together. I store lids in a separate drawer, contained by a few clear boxes to make them easy to find.

Fourth: Do as much stacking as possible.

Mixing bowls, and even glass 13×9 pans can be stacked with a rubbery mat to keep them from chipping.

Fifth: Stand stuff like pot lids and platters up.

Look at my Pinterest page for creative ideas here. It’s much easier to retrieve platters which are standing up and separated by dowels or a partition. https://www.pinterest.com/jennyrossomorin/kitchen-organizing-ideas/

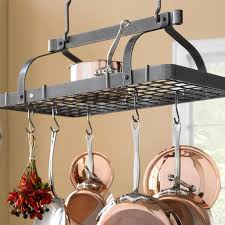
Sixth: A ceiling-mounted pot rack will hold a multitude of pots and pans!

I used one in Vermont, and I loved it. If you need more storage space, look around. Is there an empty bit of wall to install a few hooks?

Seventh: Look inside.

Many people install small baskets inside cabinet doors to hold spices or essential oils. If you don’t want to drill into your cabinets, try sticky hooks. They are very strong and easily removable.

I hope these kitchen ideas help you!

Liked this post? Please share it on your social media of choice! Copy and paste this to share:  https://efficientspacesco.c.wpstage.net/blog/

As always, if you need more help, check out my book on Amazon: Get Organized Quick. It has a chapter on keeping counters clear. With over 100 tips on organizing, it is a goldmine of ideas!

Click here for my book: https://www.amazon.com/Get-Organized-Quick-Minutes-Organize-ebook/dp/B01KKY30TS/ref=sr_1_1?ie=UTF8&qid=1524229138&sr=8-1&keywords=get+organized+quick 

Resources: 

https://www.diynetwork.com/how-to/rooms-and-spaces/kitchen/8-ways-to-make-a-small-kitchen-sizzle. Photo credit for galley kitchen image.

Pot rack image courtesy Bed Bath and Beyond.

Start downsizing now

You will thank yourself later

Have you thought about downsizing? Say you have a 3,000-square foot home with 3 bedrooms and it’s just the two of you rattling around in there. Or, you are the son or daughter of such a couple. Either you or your parents are in the 70s with good health and are still pretty active. Now is the perfect time to start ‘downsizing in place’.

Are you one of those people who likes to plan ahead, or do you wait until things happen to you? The former is called being proactive, the latter is reactive. As Steven R Covey so aptly put it:

We are the creative force of our life, and through our own decisions rather than our conditions, if we carefully learn to do certain things, we can accomplish those goals.    ~Steven R. Covey

The time will come, sooner than you think, when you will have to make some decisions. Is it time to move yourself or your parents into a smaller home or even a retirement community? And when that time comes, will help be needed? Are you willing to spend every weekend purging 20 to 30 years’ worth of belongings? And if you are separated from your parents by distance, how is this even to be accomplished?

Now is the time to ask yourself these questions, start to plan, and start to downsize in place. Do not procrastinate!

Start downsizing today; you will thank you tomorrow!

The first step, even before contacting a real estate agent, is to contact a professional organizer or senior move manager. The good ones will be members of NAPO or SMM. I am a member of NAPO, the National Association of Professional Organizers.

A professional organizer trained in move management can help you handle every aspect of the move, from the estate sale to deciding what furniture will fit in the new, smaller residence. Most organizers will even draw you up a floor plan, showing you how it all fits together, and see to all the little details you haven’t even considered yet. It’s truly a smart ‘MOVE’ to engage an expert in this complicated and stressful time. Having someone guide you through the process and take care of the details brings great peace of mind.

Ideas to make downsizing easier:

  1. Start with the end in mind. Motivate yourself or your parents by thinking about how nice it will be to have this project done. What will your home look like, feel like? Also, think about how much easier the move will be due to your downsizing work.                                        *Begin with the end in mind is Steven R. Covey’s Habit 2.
  2. Focus on what is important to them (or you).
  3. Focus on the memories of the item, not the item itself.
  4. Remind them (or yourself) the amount of space available in the new digs:  Say to Great Aunt Tillie, ‘You are going to have one closet, not three! You can’t keep 30 pairs of high heels!’
  5. Remember there is no Maybe pile; either you can fit it or it is time to let it go.

Also, find a way for grandkids to get involved, especially younger grandkids who are in junior high or early high school. My son Jacob was assigned a ‘heritage project’ to interview his oldest living relative, my grandmother, for a middle school project. She has had a really interesting life. (She still dyed her hair blonde well into her 70s.) My Grandmom and Jacob really connected. It was a blessing for them both. Which brings me to #6:

  1. Help your parents see that it’s their memories and stories, not the stuff they have collected that is important in their golden years.
  2. Go through family heirlooms and photos. What a great activity to get grandchildren involved in family history and connect them to their roots! LABEL the back of older pictures with as much information as possible. If this project is for your parents, ask them to start labeling. Even if they don’t live nearby, you can encourage them with a phone call each week. Professional organizers such as myself often have training in preserving and organizing family photos and will scan pictures so you can share memories easily.

These are all great ideas, and my challenge to you is: pick one of the actions I mentioned in this blog and do it THIS WEEK!  Be proactive, like the productivity guru says! It really will pay off.

Start downsizing TODAY and you will thank YOU tomorrow!

Resources:    Steven R Covey: The 7 Habits of Highly Effective People. www.brainyquote.com/authors/stephen_covey

https://efficientspacesco.c.wpstage.net/services/downsizing/

https://efficientspacesco.c.wpstage.net/2014/08/stress-moving/

https://efficientspacesco.c.wpstage.net/2017/09/good-advice-letting-downsize/


12 Days of Christmas Tips

12 New Tips to make Christmas Prep easier

An early present for you!

This song is all in good fun. When I work with clients, they purge all kinds of funky stuff, which I donate to 
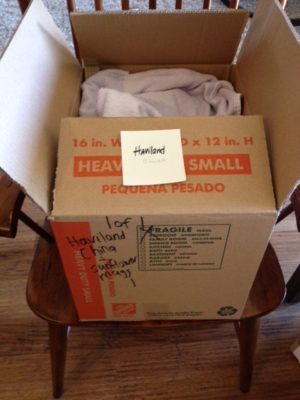
thrift stores. So, once a year, I celebrate by having a little fun with the 12 days of Christmas poem.  This new and improved 12 days has 12 tips to make your holiday prep less stressful!

On the 1st day of Christmas, my client gave to me: a pre-lit ceramic tree.

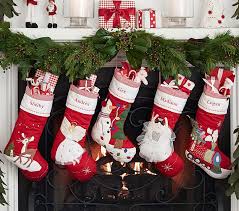
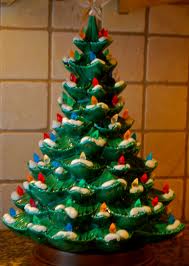
Tip: Take out one decoration that really inspires you. For me, a homemade advent calendar does the trick. Each pocket has 1 simple activity and a small ornament inside. Keep it simple, silly!

On the 2nd day of Christmas, my client gave to me: 2 Kleenex boxes, and a pre-lit ceramic tree.

Tip: Do-ahead tip: take stock of your tape, wrapping paper and tag supplies. If you don’t have enough, put them on your shopping list!

On the 3rd day of Christmas, my client gave to me: 3 rubber chickens, 2 Kleenex boxes, and a pre-lit ceramic tree.

Tip: Remember the movie Christmas with the Kranks? Don’t get stuck doing last-minute food shopping like Mrs. Krank. Plan the main dishes and the type of meat you’ll have, then include them on your shopping list too!

On the 4th day of Christmas, my client gave to me:
4 Rolodexes, 3 rubber chickens, 2 Kleenex boxes, and a pre-lit ceramic tree.

Tip: Speaking of Rolodexes:  if you haven’t gotten cards out yet, it’s time to do it. One way I make this easier: Use Sendout cards. It’s a painless way to send out cards to the important people in your life. You make a card online, put in names and addresses, then they send it out. No licking envelopes! It costs about $1 per card & stamp. My Sendout cards contact: Teresa Ball: www.Sendoutcards.com/teresaball.

On the 5th day of Christmas, 
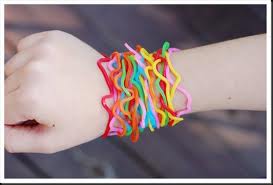
my client gave to me: 5 silly bands, 4 Rolodexes, 3 rubber chickens, 2 Kleenex boxes, and a pre-lit ceramic tree.

Tip: To keep Christmas a happy, not stressful time, do something for someone else! Notice the decorations still left in boxes. You haven’t used them for several years but they are in good shape. Bag them up and stick them in your car to drop off at a thrift store. Know that another family in town will save money and use them to make a festive home!

On the 6th day of Christmas, my client gave to me:6 sticky jelly beans, 5 silly bands, 4 Rolodexes, 3 rubber chickens, 2 Kleenex boxes, and a pre-lit ceramic tree.

Tip: Don’t forget the cleaning: we don’t want to find sticky jelly beans staining our couch 
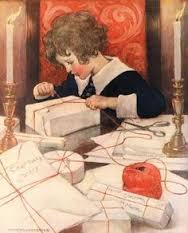
cushions! Just like everything else, make a plan for when to clean certain areas of the house. If you’re having guests one night, remember don’t spend too much time on the floors, they’re just going to get dirty again! Do a quick clean before and a thorough clean after!

On the 7th day of Christmas, my client gave to me: 7 gift bags, 6 sticky jelly beans, 5 silly bands, 4 Rolodexes, 3 rubber chickens, 2 Kleenex boxes, and a pre-lit ceramic tree.

Tip: Remember to keep it simple, silly, to KISS. Don’t overbuy, and stick to your list! I avoid the mall as much as possible by ordering gifts online. I find I don’t impulse buy online.

On the 8th day of Christmas, my client gave to me: 8 singing fish, 7 gift bags, 6 sticky jelly beans, 5 silly bands, 4 Rolodexes, 3 rubber chickens, 2 Kleenex boxes, and a pre-lit ceramic tree.

Tip: If you’re planning to give cookie plates or simple gifts to friends, neighbors and teachers, order the supplies now. This year I’m keeping it simple and using an idea I found through Pinterest. Hint: Everyone, including teachers, loves chocolate. I literally KISS this Christmas with Hershey’s kisses. Here’s the link: https://www.pinterest.com/jennyrossomorin/christmas/

On the 9th day of Christmas, my client gave to me: 9 card boxes, 8 singing fish, 7 gift bags, 6 sticky jelly beans, 5 silly bands, 4 Rolodexes, 3 rubber chickens, 2 Kleenex boxes, and a pre-lit ceramic tree.
Tip: First you get a trickle, then you get a flood right before the 25th. I’m talking about cards! Some easy display ideas: A simple Christmassy clothesline hung over a doorway or on a beam works well. I created my own compact display by tying ribbons to a decorated clothes hanger and using mini clothespins to attach the cards!

On the 10th day of Christmas, my client gave to me: 10 pairs of glasses, 9 card boxes, 8 singing fish, 7 gift bags, 6 sticky jelly beans, 5 silly bands, 4 Rolodexes, 3 rubber chickens, 2 Kleenex boxes, and a pre-lit ceramic tree.

Tip: For glass ornaments, put delicate ornaments together, and use bubble wrap or brown packing paper to keep them safe (newsprint may rub off on ornaments). Or make your life even easier by investing in a nifty bulb storage container. Craft or home stores carry these.

On the 11th day of Christmas, my client gave to me: 11 Eighties albums, 10 pairs of glasses, 9 card boxes, 8 singing fish, 7 gift bags, 6 sticky jelly beans, 5 silly bands, 4 Rolodexes, 3 rubber chickens, 2 Kleenex boxes, and a pre-lit ceramic tree.

Tip: D
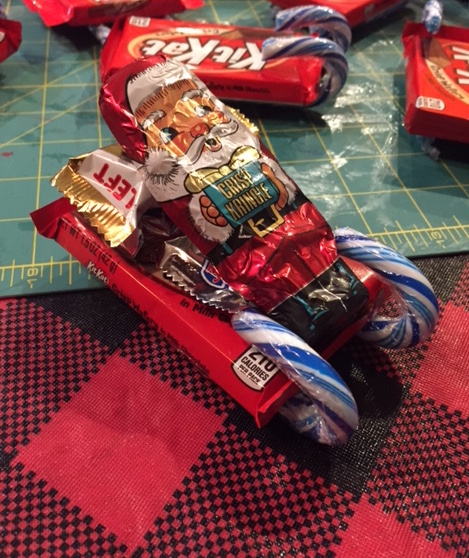
on’t forget to make it fun—play music and movies! While you are wrapping or decorating, crank up the Christmas carols or The Messiah by the Tabernacle Choir at Temple Square! A great way to store your holiday CD’s is a simple shoe box with a label. You can even store them with your Christmas decorations to save on shelf space during the year. (As long as the temperature doesn’t rise above 90 degrees in your storage area.)

On the 12th day of Christmas, my client gave to me: 12 fridge magnets, 11 Eighties albums, 10 pairs of glasses, 9 card boxes, 8 singing fish, 7 gift bags, 6 sticky jelly beans, 5 silly bands, 4 Rolodexes, 3 rubber chickens, 2 Kleenex boxes, and a pre-lit ceramic tree.

Tip: Christmas is 10 days away. If you’ve planned ahead and made your lists, purchased what you need and done some work, you are in a good place right now. If you are a procrastinator, you’ve waited to get started. Don’t panic. Just pare down your list of tasks as much as possible and outsource. Today is a great time to make some cookie dough, cook up a batch or two and freeze the remainder.

You can even deliver some to friends. I’m sure they will be thankful for you!

In the words of Tiny Tim: And God bless us, every one!

Halloween pumpkins carved

Scary Spaces

Scary Spaces

Do you have a frighteningly disorganized space in your house, business or garage? A kid’s bedroom, the laundry room, the fridge? Have you ever opened the door of a room, cringed, then quietly closed the door and snuck away? Many people have a “junk” room in their house, which becomes a dumping ground for anything they don’t know what to do with. And let’s face it—there’s a lot of stuff that fits that description. Scary.

A frightening room

A recent organizing client of mine has just such a scary room. She wants to have her brother come visit her, but the spare room is a junk room, with piles about 3 feet high and a tiny “goat path” which allows one to walk about halfway into the room. She is embarrassed by the mess and called me in to make it orderly again. That’s what I do—I take spaces from scary and chaotic to calm and orderly.

I’ve seen a lot of scary spaces over the years and the first thing I tell my clients is: I’ve seen worse. Then I encourage them, tell them I know how to make the piles disappear. It’s not magic, but the method I use works. We work together on the piles, purging and sorting until the room is organized!

See this cool slideshow I put together of scary spaces that I transformed!

[metaslider id=1757]

So, there is Hope, and that’s why I created this acronym for you this month.

How to prevent scary spaces: (This works to fix scary spaces too.)

Have H.O.P.E.

H is for Home:

Everything needs a home. Assign a “home” to everything you use. Whether it be seasonal dishes, food, craft supplies, decorations, wrapping supplies, cards, mementos, etc. they all need a home. This means a place where that item “lives.” For a clean look, choose a spot that’s out of sight unless you use it every day.

O is for Orderly:

Take time to put things away in an orderly fashion. This can be done daily or even weekly, depending on the area. An organized house doesn’t just happen. After the initial burst of energetic organizing, maintenance is the key to an orderly space. Constant Vigilance!

 P is for Procrastination:

Stop procrastinating any purging and organizing you need to do. If you have piles, tackle them ruthlessly! Remember to be ruthless, not reckless when you purge. Then quickly get those things out of the house and to a thrift store or the trash. I’ve noticed sometimes things that have been discarded end up back in the house. This is why I take all donation items with me when I leave each client’s home or office.

E is for Evaluate:

Be cautious and evaluate where something will fit in your home before you even buy it. Clothing, kitchen appliances, or other toys apply. Thinking about buying a large piece of equipment? Will it fit in your garage or could you rent it instead, or borrow your friend’s? Offer to help them with a project or bring them some homemade bread or get them a gift card as a thank you.

Last tip: Labeling is a good idea if you share the space with your family or roommates. Once you’ve created a home for everything, take a labeler or some sticky tape and a marker, then go label happy! It doesn’t have to be a beautiful, perfect labeling system like you see on Pinterest, as long as you can read it, that’s all you need.

If you’re daunted by a scary space in your home, remember to apply HOPE to your life. The chaos will become order. It’s not magic, but sometimes it seems miraculous when you enjoy the final result: an organized home with everything in its place. Now you can rest in peace.

Good advice for letting go as you downsize

8 Great tips to Let Go

I recently spoke at a senior fair about downsizing. When I asked everyone ‘what is the hardest thing about downsizing?’ many answered: the memories. Another reply that resonated: the decisions.

When downsizing is a must, the time to let go of some memories has come. I know a lot of clients who save things from their children’s childhood and high school years. This is a burden for most parents, because it sometimes fills an entire room in their home.

Other times, the mementos that get saved are family heirlooms like furniture, quilts, and photos.

It is difficult for most of us to let go of possessions which stir memories. I think some of us grow more sentimental as the years pass. I know it’s hard, but sometimes has to be done, especially if you need to move to a smaller place. To make it easier, I have some advice that has helped my clients.

How to let go

  1. Ask yourself: ‘Why am I keeping this? Does it mean anything to me?’
  2. Ask yourself: ‘Do I use it?’
  3. Ask yourself:  ‘Do I love it?’ And if so, do you display it somewhere so you can enjoy it, or is it packed away in a box?  If you don’t use it or love it, let it go.

From a recent article, Organizer Jodie Watson shares her favorite trick. “In any given category, let’s say artwork that you have hung on the wall, ask this question, ‘If I could only take three pieces with me, which three would they be?’ With books, the question might be, ‘If I can only take 20 with me, which 20 would they be?’ This will help you discover the ones that are more meaningful than the others. These are the ones to take with you, the rest are negotiable.” (Watson owns Supreme Organization)*

  1. Be ruthless, not reckless. This means getting rid of all the paraphernalia from a craft you don’t do any more. Or, be ruthless by getting rid of ALL your old magazines. An example of being reckless would be to get rid of an entire box full of things without quickly looking through it. There might be money or a piece of jewelry inside. One of my clients found a check for 300 dollars in a box of old mail and magazines!
  2. Stop saving things for children or grandchildren. You are not the family’s storage unit! Plan ahead by asking children what they would like to have from their mementos and your house. Then you know you can let go of the rest of their stuff, because it is not important to them. Box up what they want and ship it to them, or give them a few months to come and get larger items.
  3. Let go of gifts from others that aren’t bringing you enjoyment. It’s hard to do sometimes. But just because someone gave you a gift doesn’t mean you need to keep it forever. Ask yourself, ‘Does this have a future with me?’ Remember the love is in the giving; you received it with gratitude, and enjoyed it but don’t need it any more.  Your friend wouldn’t want you to be burdened with toting around that gift for the rest of your life!
  4. Make it easier to let go by having a favorite charity or thrift store to donate to. Many hospitals run a thrift store, and the Gospel Rescue Mission helps people get back on their feet. Picture someone enjoying those shoes or that extra winter coat you don’t need any more! Visualizing this will be very helpful when you are letting go. And don’t forget to get a receipt when you donate. It is helpful to jot down a quick description of what you’re donating so at tax time you can get an estimate of the value. For example, I usually state how many bags of clothing I donate, and mention larger items specifically.
  5. Get help. If you find you want to keep everything, here’s a great trick. Invite a friend to come over and help you. Have them hold the item, then you decide by just looking at it whether you will keep it or let it go. Many times, touching an object like a book or a sweater will cause you to feel more attached to it.

If you’ve tried these ideas and you’re still having a hard time letting go, this means you are “stuck”. It is a good time to look into hiring a professional organizer to help you. Organizers are skilled in helping people come to decisions that they will be happy with. Downsizing is much easier and less stressful with a professional to guide and assist you. You may even start to enjoy it!

 Good things to keep:

  • Important documents like deeds, wills, medical records, birth and death records, marriage licenses, divorce decrees, social security cards, pension plan docs, insurance policies, passports, power of attorney docs, investment records, education records, genealogy records, diplomas, military service records and vehicle titles.
  • Family photos. Keep antique photos, and if you have mountains of family snapshots, scan them and keep them on your computer and on a backup disk.
  • Basic kitchen supplies.
  • Emergency supplies like first aid kits, an extra blanket for the car, etc.
  • Journals and a reasonable number of favorite books.

*Resources:

http://www.housebeautiful.com/lifestyle/organizing-tips/advice/a3173/never-throw-out-when-downsizing/

link to Jodie Watson’s webpage: http://www.supremeorganization.com/wordpress1/

The Climb

This spring, I wasn’t in tip-top shape. Even though I exercise 3x a week at the gym, I lacked stamina. So, when the trail dried out enough, Frank and I started hiking Dollar Mountain, a short walk from our home. I knew it would take conditioning to reach my ultimate goal: to reach the tower, about 3 miles round trip.

Now, a short walk sounds deceptively easy, but the walk TO the hill is one of the toughest parts. It resembles a ski slope in steepness.

So, I started small.

My first milestone: to walk uphill for 45 minutes.

That first day, I huffed and puffed along the way. I have trained my dog Bella to pull me up the hill, which helped. (No, that’s not cheating!) Frank’s encouragement made a difference, as well as my competitive spirit to keep up with him.

The next time we climbed, I wanted to make it farther, to the gravel pit. But time constraints (a morning appointment) kept me from getting there.

To me, the gravel pit represents the halfway point, even though it’s more than halfway. That’s where the grueling final steep climb starts, about half a mile of steep gravelly slope. It’s also where I see the best views of countryside.

The Second Milestone: Reach the gravel pit

Next time we climbed it, I managed to get to the gravel pit. A small celebration for reaching the second milestone.

Then I didn’t hike it again for over a week and lost my momentum.

Today started out different. I told myself I would make it to the top. I had a good night’s sleep, my legs were rested, and the temps were just right—in the 50’s-60’s.  (OBSTACLES REMOVED)

Frank, Bella and I started out well, though he had to wait for me a bit, the first steep climb up TO the trail seemed easier. I made sure to keep up Bella’s training to pull me up the steepest parts, which is just enough of a pull to give me that ‘extra push’.

I enjoyed the view as I caught my breath at our traditional resting point, which is the steepest bit of trail, near the beginning of the climb. From then on, the uphill isn’t as steep until the very end.

So, the trail goes up and down a bit in the next part, with some nice vistas of our green wooded hills and lots of birdsong. We enjoyed a companionable silence. As we came around a bend, the tower we’re aiming for came into view. With encouragement from Frank, and a quick conversation with my best friend, I made it to the gravel pit. By then Frank and I were deep in conversation, and I almost didn’t realize it as we started up the steep gravel slope.

The Final Push to the top

As soon as I started to think how hard it is—right about the same time my glutes are burning, that’s when it starts to FEEL difficult. It’s amazing how the distraction of our conversation at the start of the gravel slope made the hill feel less difficult. I had Bella’s help on the final steep climb, though. Her little tug is just what I need to propel me to the top.

And YAY we are HERE! Touch the wire fence around the tower, because that makes it official (at least that’s what our kids tell us).

I bask in the morning, enjoy the view with my sweetheart, and gratitude fills me up. I did it!

Parallels in your climb to a goal:

  1. Tell me what ya want (goal)
  2. Get movin’
  3. Kick any obstacles in the hiney
  4. Party
  5. A little help from my friends
  6. Keep the tower in your sights
  7. Keep movin’ on up
  8. Reach the peak
  9. Celebrate!
  10. Give gratitude

Questions to think about:

What would have happened if Jenny made the goal to climb to the top the first day she hiked it?  Setting an unrealistic goal will be discouraging if not attained.

What knowledge about myself is pertinent to planning how to reach the goal? This will be different for everyone. Ex: Jenny knows she will not push herself to the point of pain just to reach the top on the first day. She doesn’t like being sore for days afterward.

What obstacles do I face along the way, or perhaps even before I start?

Are there natural milestones on the way to my goal that I can use to mark my progress?  A time, like a month, a distance, an accomplishment?

Who or what will motivate me along the way? Do I need encouragement, competition, a partner, etc.?

What assistance will I need to reach this goal? I had Frank encouraging me and Bella pulling me at times.

Do I have the knowledge or skill I need already? Or:  What do I need to develop or learn to reach this goal?

Who do I know that has done something similar to what I am planning? Will I ask them to mentor me/ answer questions to help me along the ‘climb’?


Ideas to make family time better

Tips for better family time

Are you interested in creating more enjoyable, rewarding family time? I just discovered a great resource for parents, with an emphasis on Dads: a website called All Pro Dad has 10 ideas for consciously creating better family time. As I read, I thought about things my parents did right. Neither one of them had ideal family situations growing up, but they made a happy home for me and my 3 siblings. I’ll get kinda personal and share 3 stories these tips reminded me of.

For those of you who did the quiz on my newsletter, the top 3 tips in order are: Eat together, Read often, and Do chores together.

For better family time:  1. Eat together

This was one of the traditions in my family growing up. My Dad, being Italian, insisted on this. I’m sure both my parents agreed it was important and they made it a priority. In my family now, we have continued this tradition, and it’s some of the best time (and sometimes the only time) we have together each day. Now that we have 2 teenagers, we don’t always manage to have everyone there every night, so it is challenging. A little advance planning goes a long way.

For example, 2 nights a week Emily has spring band practice. On Wednesday night, we eat dinner between the time she gets home and the time we have our 7 pm activity. It’s tight, but we make it work. Also, sometimes we have to eat earlier than normal to get everyone around the table. It’s worth the extra effort to get everyone around the table, talking and laughing together!

For better family time: 2. Read often.

I am a big believer in reading with children and frequent trips to the library, especially when they are young! Kids are naturally curious, and showing them a myriad of books will spark new interests and a love of learning. When my kids were little (and we had more time together) we’d make a weekly trip to the library. We all looked forward to it. And of course, sitting down to read together in the daytime and at bedtime is special time we enjoyed each night. I know one Dad who still reads to his teenagers every night. They’ve progressed way beyond picture books, but what a great tradition!

Story: When I was a teenager, my family would visit our the farm where my grandmother grew up in North Whitefield, Maine. It had no electricity, so at night my Mom (who came prepared) read to us for entertainment. I distinctly remember her reading a Tarzan novel to us one night by lamplight. The adventure, the drama. You’d think we were too old for that but we LOVED it! What a cherished memory.

It’s these kinds of moments that build better relationships with our children and teens. These activities that don’t cost any money, just time. Time is what we need to give, to whatever activity interests our kids the most.

For better family time: 3. Do chores together.

They might whine and complain for the first few minutes, but if you are willing to spend the time with children to train them, to show them how to clean or stack wood, they will come to enjoy it. When the kids are young, they want to be like Mommy and Daddy. They see us doing dishes or using the vacuum, and they want to try it. Let them! Show them how to do simple jobs when their interest is piqued.

And if your kids are already older, it is not too late. Sit them down and explain:

“Your father and I have done you a disservice. We have been doing everything for you up until now. But if we continue like this, you won’t know what to do when you get on your own in __ years. It’s time to learn how to ______  and _______ so you aren’t helpless when you get your first apartment/ go to college/ get married.

Plus, is it really OK for the Mom or even both parents to do the lion’s share of work in the home? Parents today have less time than ever. It’s important to get the kids involved in keeping the home clean, the family fed, and the yard maintained. It’s the way life works. I don’t know any employers who would react well to the statement:  “I’ve never done that, can you do it for me?”

Story: I mentioned stacking wood earlier. That brought back a memory for me. My Dad, a forester in Maine, loved to give service, especially to widows. One night, he informed us we would be going to split and stack firewood for a widow at church for our family night activity. At first, we whined and complained, (especially when we saw the mile-high stack of wood we had to stack!) but once we started working, we began to really enjoy it. My hyper younger brothers had something to keep them busy and focused. Best of all, we got our Dad’s undivided attention for several hours, which was rare during our childhood. That night we worked together remains one of my best childhood memories. In fact, it was our most memorable family night ever.

Lessons learned: serving and helping as a family is especially rewarding. Teaching kids how to work is important, and they learn while they are young that it’s just part of being a family.

Read the full article: http://www.allprodad.com/10-tips-to-better-family-time/

Tell me what YOU think! Is it ok for the Mom or even both parents to do the lion’s share of work in the home? What was the philosophy on pitching in while you were growing up in and how did it help/hurt your future family?   https://www.facebook.com/OrganizingAttics2Basements/?pnref=lhc

Did you like this article? Click Here to subscribe to my newsletter!  https://efficientspacesco.c.wpstage.net/660-2/

Also, on my Pinterest page, I’ve posted some creative ideas for chore reminders and rewards.  Click here to get great ideas: https://www.pinterest.com/jennyrossomorin/kids-and-parenting/

Until next time, bye!   Jenny

Resources:

http://www.allprodad.com/10-tips-to-better-family-time/

Another great resource is parent educator Vicki Hoefle.

http://vickihoefle.com/tools-success/

Art:Picture of boy with firewood courtesy VisualHunt.com

Earth Day Radio show!

Woo-hoo, my Radio Debut!

Back in February, Aletha Nowitsky of KSKQ radio Ashland called and asked me to be on her radio show. On Earth day, April 20, we recorded a live show. Pretty exciting for me, really. I share some of my stories and some great info:

  • How I got started
  • What a session with me is like
  • Jenny’s thoughts on Marie Kondo
  • What does clutter say about you?
  • Plus, many success stories from clients

Click on the play button above to hear the ‘Innerview’.

Feel free to share this page on your social media! It’s easy, just click on Pinterest, FB icons hovering at the lower left of your screen!


Mother’s Day: What does Mom really want?

What does a Mom really want for Mother’s Day? (It’s not chocolate.) How about something that will last: an organized pantry!

If the pantry has gone all winter and spring without a tidy, it definitely needs one now. So, for all you mothers out there, print this article and give it to your kids. This will the Best Mother’s Day present ever!  Inspiring pantry organization, yes?

Mothers, be sure to let your kids know you don’t expect the pantry to look exactly like this; the only thing that matters is how easy-to-use and effective it is. You want to be able to find the food or ingredient you are looking for without searching for hours. You could even do this project with your kids Mother’s Day weekend, and teach them a useful life skill!

Pantry Organizing steps for Mother’s Day:

  1. Make a plan. Have a picture to guide you, and use this handy organization tool on my Pinterest board for ideas on where to put foodstuffs.
  2. Gather your supplies: A radio, a footstool, a metal bowl with dish soap and warm water, a cotton cloth, white vinegar, an absorbent towel, Post-it notes, a Sharpie, painter’s tape, and a labeler. You’ll need a box for food donations and trash can for expired food.
  3. Make it fun! Rock out to your favorite music. You can even work with a teammate: many hands make for light work.
  4. Clean it. Take everything off one shelf, look for expired items or foods you don’t like. Put them in the ‘circular file’ or food pantry box. Then wipe off the shelf with soapy water containing one tablespoon of vinegar.
  5. Organize food by zone: snacks, lunch supplies, powdered drinks, cereals, pasta, soups, etc. Now, take some painter’s tape and make temporary labels for the zones you’ve planned to make on the shelves.
  6. Sort it:  Place items that fit your zone back on the shelf, but the others will stay on the counter for now. Use a Post-it (or scrap paper and tape) to label your “zones” while they are still on the counter. Gathering similar items together on the counter makes it easy to see how much space you’ll need in your pantry shelves.
  7. Put stuff away: Work your way down, emptying each shelf and cleaning it, then replacing the food in its “home” or zone, according to your plan.
  8. Time to Label! This is the fun part, for kids love labeling. Here’s an idea to save labeler tape: type all of your label names (pasta, nuts, etc.) all in a long label before pressing print. This way, you won’t have lots of wasted white space on your tape.

Ideas for Pantry Problems:

  • Try creative solutions for the deep corners in your pantry. I measured them, then ordered a few Lazy Susans to fit. Now they hold cans and jars. Just need to spin it to see what you have!
  • What to do with the chips? Well, my Pinterest board has lots of ideas for this pantry dilemma. The easiest idea so far: use self-sticking plastic hooks (like 3M) directly attached to wall space, in a neat vertical line. Chip clips have a little hole in them, so they will easily attach.
  • Maximize can storage: Most pantry shelves have 10-12 inches of headroom. To maximize storage, I bought a wire shelf so I can double stack cans of soup and vegetables.
  • Give your cleaning tools a home: If your broom and dustpan are hanging out on the floor, take fifteen minutes and install a tool organizer on the wall. I actually hang my duster and steam mop from it as well!

Safety Tip: Install a fire extinguisher to the pantry wall. Kitchen fires are a hazard, and it pays to be prepared! Teach your whole family how to use it so you’re ready for an emergency.

Resources:

Click to see more ideas on my Pinterest page:  https://www.pinterest.com/jennyrossomorin/organized-kitchen/

Space saving ideas for a small laundry room: Tips to make it a pleasing place to be

So, I’ve noticed a trend among my clients and friends lately. A laundry room trend. Several of them are organizing it,  remodeling it, or WANT to remodel it. Most of us have small laundry room, so here are some great ideas how to make the most of your space.

Space saving Ideas for a small laundry room

Last year, I remodeled my laundry room. Quite a process. I thought it would be this easy little project. Wrong! A lot goes into a laundry room, literally. I started out with my inspiration: a picture I clipped from a magazine.

Sure, it wouldn’t be hard to get that look in my little laundry room? It is little, it measures 10 x 6. And it’s an odd shape, with a weird angled wall.

Space saving idea #1 Get stackables if you can.

This enabled me to have room for a laundry sink which – gasp – mine didn’t include. Getting a sink in there was my main motivation for remodeling the room.

Space saving idea #2:  Utilize your wall space.

When I looked up, I noticed all the space we could use on the walls. Things I installed on the wall:

  1. An expandable drying rack.
  2. A shelf for large items.
  3. A closet rod to hang delicates, white shirts, etc.
  4. Don’t forget the back of the door! A good place for a hook or even a towel bar (with some hooks or clothespins) for some air-drying.
  5. A cupboard or open shelf to hold detergent and cleaning supplies.

Other ideas for laundry room wall space:

  • Cute square baskets for small laundry supplies.
  • Large hooks.
  • A retractable clothesline (see the picture on my Pinterest page: https://www.pinterest.com/jennyrossomorin/organized-laundry-room/
  • Hang the ironing board and iron on a nifty rack installed on the wall.
  • If you have side-by-side washer & dryer, install a shelf directly over them to hold cloths, detergent, etc.

Don’t forget the ceiling!

One idea I love is to hang a painted ladder from the ceiling and use hangers for air-dry items. Others hang sweater dryers or even decorative items like washboards or eye-catching pendant lights from the ceiling. It can look cute even if it’s a laundry room!

I do this. I got a few stackable drying racks at the Container Store.  A little assembly is required, but it is easy. And Voila, dry 2 or 3 sweaters right there in your laundry room! I used to have to dry one sweater at a time on my cedar chest in my room. Those days are over.

Part II Declutter your laundry room

I’ve noticed more friends and clients lately are frustrated by waaay too much clutter in their laundry room! I worked for one Mom a month ago whose laundry room was a catchall for all kinds of clutter. And another client said hers is a sore spot, too.

What can be done? Well, if I was in your laundry room, first of all, take off my blindfold, and then I would look around. Remember, a little planning can save you a lot of work in the long run. So, my first action as an organizer: I would notice what is piling up. In fact, this is the first question I would ask you:

  1. What kinds of clutter is piling up? Just notice and jot down what stuff is lying around on your washer, dryer, the floor, and any counters in there. What do you have too much of? Whatever you don’t have a place for ends up as clutter, so give it a home. And if your answer was too much laundry . . . I do too!
  2. What is in here that doesn’t belong? Remember that awesome Sesame Street song: One of these things is not like the other . . .  Well, that is a great guide to help you sort out the things that don’t belong in your laundry room. Items like kids’ shoes, golf balls, toys, vacuum, kitchen appliances, baseball gloves and other sports equipment, tools, et cetera, et cetera. All the random stuff that doesn’t have a “home” in your home ends up getting dumped in the laundry room.
  3. Get Ideas. What’s the best place to find solutions to your clutter pileups? Pinterest, of course! So many great ideas for lots of life’s clutter dilemmas. Collect some pictures for inspiration. I actually stumbled across my dream laundry room in a magazine while in a waiting room. A link to the article is in the Resources section. Also, search for solutions to your unique issues. Just use your search engine and see what pictures come up. You will be amazed!

Click here to follow my Pinterest board: https://www.pinterest.com/jennyrossomorin/organized-laundry-room/

  1. Ideas to make it easy for the kids:

    First, train them how to do their own laundry. A little bit of training will save you hours of work later on! Try having a basket for each child’s clean laundry. Also, have a laundry sorter. Label it whites, darks and mediums as a guide. On the wall by the washer, I have a sign telling what temp different colors get washed in so they can do their own laundry with confidence. To make it easy, I have the laundry soap sitting on the counter beside the sink so everyone can reach it.

  2. Decisions, decisions

Yes, you must decide level of organization you want. Open shelves or closed cupboards? Decide how many bottles of detergent you need, how many cleaning cloths. We end up storing some of our lightbulbs and other cleaning supplies in our laundry room cabinets. But if I buy too many as a “backup” they will end up overflowing. So be careful of that!

How many towels, rags, etc. Do you have a place for everything that needs a “home” If not, create one.

6. How much time are you willing to spend organizing your laundry room?

This is going to be different for everyone. If you have plenty of time and the right skills, DIY is a good idea. If time is short, and/or you’d rather have a tooth extracted than organize, seek help from a professional. Many professional organizers have a good eye for design or know a good designer, if you want some advice there.

If you follow these instructions and still need more help, or get stuck, or if you need more than just You on the job, consider hiring a professional organizer!

Resources:

Click to see more great ideas on Pinterest: https://www.pinterest.com/jennyrossomorin/organized-laundry-room/

To see the article that originally inspired me: http://www.goodhousekeeping.com/home/organizing/tips/a25464/organized-laundry-room/

1 2 3 4 5 6 7 8
Privacy Settings
We use cookies to enhance your experience while using our website. If you are using our Services via a browser you can restrict, block or remove cookies through your web browser settings. We also use content and scripts from third parties that may use tracking technologies. You can selectively provide your consent below to allow such third party embeds. For complete information about the cookies we use, data we collect and how we process them, please check our Privacy Policy
Youtube
Consent to display content from - Youtube
Vimeo
Consent to display content from - Vimeo
Google Maps
Consent to display content from - Google
Spotify
Consent to display content from - Spotify
Sound Cloud
Consent to display content from - Sound
Schedule a Free Call