Schedule a Free Call
Category

Organizing

How to Organize Food Storage – So Nothing goes to Waste!

 5 Food Storage Basics

“Organize yourselves; prepare every needful thing.” *

The point of food storage is to have food storage in place BEFORE an emergency strikes.

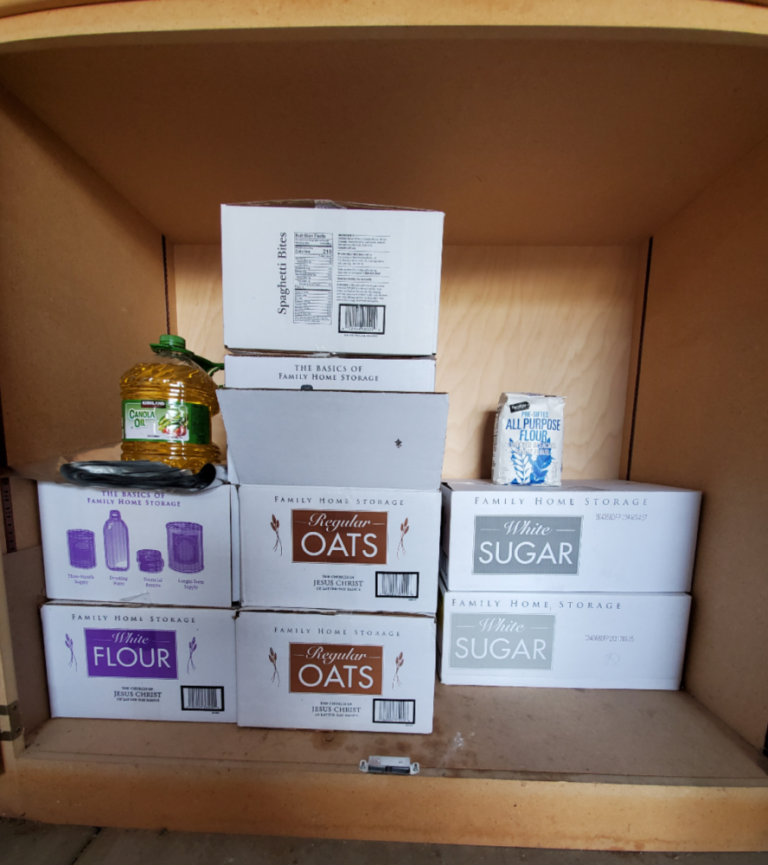
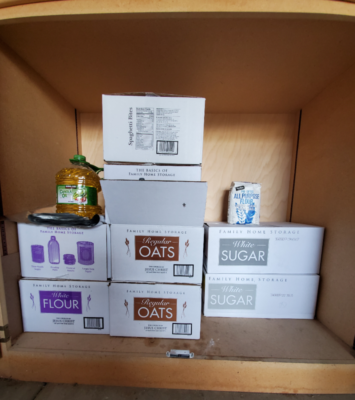
I just made a trip to a warehouse (owned by my church) to purchase a bunch of staples like flour, sugar, wheat, salt, etc. Back in February, I had the thought: I need to beef up our food storage! Organizing your food storage is so important for peace of mind when disaster strikes.

The reason: partly inspiration, partly because we had used a lot of flour and sugar last December. My son Jacob and I had baked and sold cookies to raise money for a school trip. So, I thought we were running low. (Turns out, we still had enough flour for 6 months in our storage.)

That brings me to the first step in organizing your food storage.

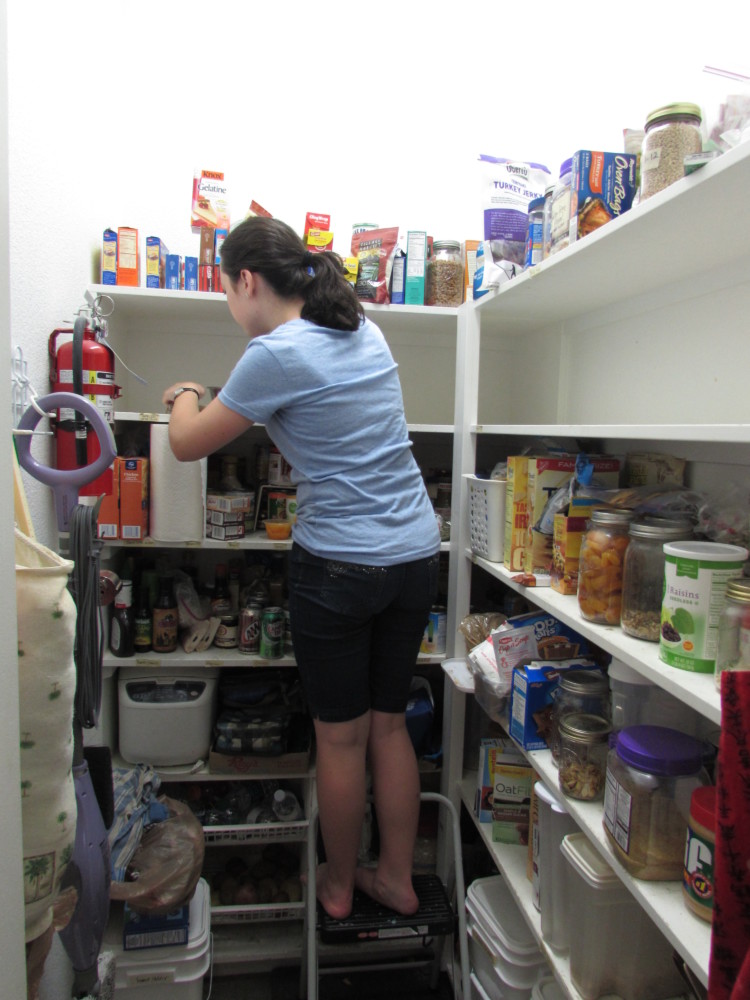
One: Know what you have.

Have you ever gone to the grocery store and bought ketchup because you thought you were almost out, only to find you have 3 bottles of ketchup in your pantry?

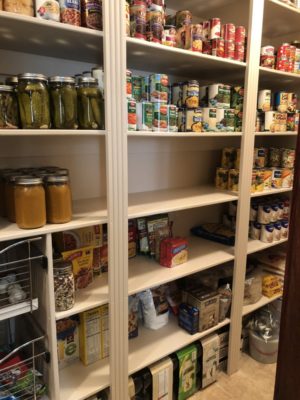
It’s crucial to know what you already have stored. Not taking an inventory before you go to the store or get online leads to waste, because your family won’t be able to consume it before it spoils.

On the other hand, when you DO take an inventory of how much flour, sugar, yeast, oil, milk powder, salt, etc. you have stored, you won’t end up with waaay too much of one item. Or too little of another staple food. You might be surprised how fast you’ve used up the flour, for example.

Here’s what I do when I purchase food to put in storage: I put the date of purchase on the container. It’s helpful to keep records and to inventory your storage at least once a year.

Two: Track how fast you consume the food.

If you want to know how fast your family uses up 10 pounds of flour, for example, there is an easy way to figure that out.  Simply label the container with an “open date,” which is the date you started consuming the flour. A piece of masking tape or white duct tape works well.

Then, when you use the last of it, note the date on the tape. It’s a great trick. Just make sure to plan for extra usage during holidays like Christmas, when you’ll do a lot more baking.

Three: Figure out what your gaps are.

What do you still need to “round out” your food storage?  Do you have everything you need to make bread, for example? What about soup? How many different meals could you make with the food you already have on hand? If you only have the ingredients for 3 different meals during an emergency, you will get mighty tired of eating those 3 meals!

One thing we like to do for variety: purchase hiking meals and MREs. It provides us great choices without having to purchase a bunch of perishable ingredients for our food storage. And they last about 10 years! They are packaged in a pouch and quite light, especially the hiking meals. Everything you need to cook the meal is inside. Super efficient!

6 Month Food Storage Supply

Four: Research how much food and water to store. 

 “If you are prepared you shall not fear”. *

Being prepared will save you from fear, because you will rest easy knowing you have enough food, water and fuel to provide for your family.

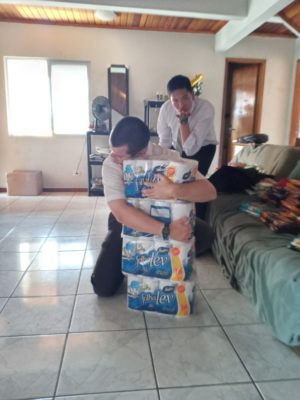
I have not worried about food, or even toilet paper, since this pandemic struck the world. Why? Because I had prepared for a disaster. I was surprised it came this soon, but that didn’t matter. The essential matter is to be ready for anything.

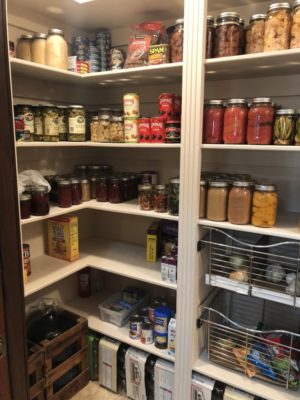
If an emergency like the Covid-19 virus comes around again, plan for married children returning home to wait it out with you.  Currently, we have 2 adult children home with us, plus one teenager. And we have plenty because we have enough food storage to feed 5 people that will last 6 months.

Definitely plan for the worst-case scenario. Purchase the food that will fill in your gaps. You can do this bit by bit, purchasing some supplies every month. Or you can buy it all at once.

Five: Finally, prepare in advance.

You saw what happened during the COVID-19 scare when everyone tried to get their food storage at the same time. It’s chaotic and a bit scary. Stores started running out of many items like toilet paper, paper towels, bleach, flour, sugar, survival foods and foods with a long shelf-life.

Q: When is the time to get your food storage together?

A: Gather food storage BEFORE disaster strikes—not after!

Be part of the solution, instead of part of the panicking masses.

Resources:

President Gordon B. Hinckley, “If ye are Prepared ye Shall Not Fear,” Oct. 2005.

https://www.churchofjesuschrist.org/study/general-conference/2005/10/if-ye-are-prepared-ye-shall-not-fear?lang=eng

*Doctrine and Covenants 109:8 https://www.churchofjesuschrist.org/study/scriptures/dc-testament/dc/109.8?lang=eng#p8  D&C 109:8

**Doctrine and Covenants 38:30, https://www.churchofjesuschrist.org/study/scriptures/dc-testament/dc/38?lang=eng

Providentliving.org: https://providentliving.churchofjesuschrist.org/?lang=eng

Building a 6-month Food Storage Supply (with table listing foods and amounts) https://actionecon.com/building-a-6-month-food-storage-supply/

1 Year food Supply for a Family of 4 http://seasonedcitizenprepper.com/feed-a-family-of-4-for-1-year-for-less-than-300/

10 Quick Steps for Organizing your Pantry

Hello! I’m Emily Morin, I’m writing these pantry organizing tips for my Mom. She’s had me clean and organize our pantry several times, so I know the how-to pretty well. Follow these quick pantry organizing ideas, and your shelves will be shining with glory in no time! And you’ll be able to find what you need quickly and easily with much less wasted food.

  1. Take all the food off the shelves one shelf at a time, starting with the top shelf.
  2. Check all the food for expiration dates and throw out the expired food. Place a trash can just outside the pantry door to make this easier.
  3. With a cotton cloth, wipe all crumbs and dust off the shelf.
  4. If there’s mildew on the shelf, use a 50-50 mixture of water and vinegar to wash it off.
  5. Dry the shelf completely.
  6. Label parts of the shelf with tape or a labeler if you have one, designating parts of the shelf for certain foods (e.g. pasta, soup, crackers, bulk). Put the label on the edge of the shelf so you can see it easily.
  7. On the top shelf, put the food or appliances you rarely use. Keep the frequently-used items at eye-level.
  8. Put the food back on the shelf which corresponds to the labels you just added. Make them organized, but you can be creative with the setup to make it look neater.
  9. Repeat all these steps for the rest of the shelves, going from the top down.
  10. After you finish all the shelves, sweep out the pantry and glory in the beautifully organized pantry you just finished!

I hope these quick pantry organizing ideas help you next time you purge and organize your pantry!

~ Emily Morin 🙂

How to Train Your Kids to Work. Yes, Really!

“Your kids are like a well-oiled machine!” Michelle Wilber.

Our sitter told me this after Frank and I came back from a multi-day trip. Apparently, after dinner, our kids got up, did the dishes and put the food away. They cleaned the bathrooms and their rooms on Saturday, as was our routine. This impressed her so much, but honestly I hadn’t thought much of it before then. Doesn’t every family pitch in work together? They should, at least this is what I believe. And it works.

So, I’d like to give some tips for how we’ve gotten to this point in our home.

What I do

  1. Make helping an expectation but keep it FUN!

Pitching in is expected in our home. My mother delegated work to me when I was young on our small farm in Maine, and I do the same with my kids. Some of my jobs included weeding the garden, mopping the wood floors, and cleaning bathrooms.

Her philosophy went something like this: I am not a slave. All joking aside, why shouldn’t kids work to make their home a more inviting place? The Mom and Dad cannot do it all.

I have a friend who was an example of trying to do all the work. She never sat down. I remember visiting her once, and I think she was able to sit down all of 5 minutes in a 2 –hour period. That’s just crazy!

I read some great ideas for making housework fun when the kids were smaller. One idea that works great for competitive families; Have a housework Olympics, and see how fast (and how well) you can complete the Saturday jobs!! The fastest, most complete cleaners win. (Mom inspects each job site.)

  1. Train children from the time they are young

This includes SHOWING them how to do it first. Some easy jobs for younger children include emptying the dishwasher and cleaning toilets (we use a non-toxic cleaner, NOT bleach).

“If you are willing to spend the time with children to train them, to show them how to clean or stack wood, they will come to enjoy it. When the kids are young, they want to be like Mommy and Daddy. They see us doing dishes or using the vacuum, and they want to try it. Let them! Show them how to do simple jobs when their interest is piqued.” From the blog 10 Tips for better Family Time.  https://efficientspacesco.c.wpstage.net/?s=10+tips+for+better+family+time

Patience is required for training. They are not going to get it perfect, and it will not be up to your standards. Just remember their coordination and level of detail is not the same as yours!

Teach them to take pride in a sparkling-clean sink and spicket. Point out how good it looks when it’s clean.

I firmly believe that teaching children to work bolsters their confidence and self-esteem. They see they can do a job, do it well, and make a difference in the way their home looks and functions. This method is more effective than constant compliments.

  1. Lower the bar

As my organizing mentor Porter Knight used to say in one of her speeches: lower the bar. Set your expectations lower than you would for an older teen or adult.

Porter had her sons clean the bathrooms. Were they perfect? No. But they were the best her 11-yr old son could do, so it was good enough. Don’t be too picky of they will be discouraged and not want to help next time.

Instead, praise each child’s effort and bite your tongue!

  1. Encourage them

Note: I didn’t say PRAISE; I said encourage. First off, don’t be patronizing if they are older, be sincere and find something you liked about their work. If something needs to be re-done, use the sandwich technique.

I liked how you ——, could you scrub the orange ring by the sink drain a bit more? I am sure you can do it  if you put a little more time in.

But if you sense they are not giving it their full effort or doing their best, definitely ask them to try again. If they still aren’t’getting it, see if they understand what you asked them to do, and provide some more patient training.

Don’t bribe them, but definitely give them a reward or incentive. I have some special chocolate truffles I give the teens when they complete jobs they dislike. They also get paid each month for the work they do, but an immediate reward is quite effective. Everybody in my house likes chocolate. One time we motivated the kids for a big job of spreading mulch on all the flower beds by telling them we’d go to DQ afterward. My kids will do almost anything for ice cream!

  1. My kids are teens, is it too late?

When our kids were young, we lived in Vermont and heard about an amazing parenting program. It is called Parenting On Track by Vicki Hoefle. She insists you can still train teens to work.

“They might whine and complain for the first few minutes, but sit them down and explain:

“Your father and I have done you a disservice. We have been doing everything for you up until now. But if we continue like this, you won’t know what to do when you get on your own in __ years. It’s time to learn how to ______  and ______ so you aren’t helpless when you get your first apartment/ go to college/ get married.

Plus, is it really OK for the Mom or even both parents to do the lion’s share of work in the home? Parents today have less time than ever. It’s important to get the kids involved in keeping the home clean, the family fed, and the yard maintained. It’s the way life works. I don’t know any employers who would react well to the statement: “I’ve never done that, can you do it for me?” (from an earlier blog 10 Tips for Better Family Time.) https://efficientspacesco.c.wpstage.net/?s=10+tips+for+better+family+time

Vicki also has a great list of things kids need to be able to do on their own by the time they are 18. One night, when we went through that list with our kids, we realized one of our daughters had never mowed the lawn!  We soon started training her to do that. She was on board.

Also, one great thing about having older children who know how to work is: they can train their younger sibs to do certain jobs (if they have the right temperament and the two kids get along well). Otherwise, you may need to train the younger kids to make it a positive experience.

  1. Pick your battles

This is true for many things in parenting. If a child really doesn’t want to do a job, compromise and assign them a different job whenever possible. If it is something they have to do, like cleaning their room, find out what the issue is. Sometimes they may have no idea where to start, like many of my organizing clients. Just helping them with some ideas or talking about it can stave off a grumpy attitude.

  1. Keep their strengths and interests in mind when assigning tasks.

For example, my daughter Kate loves to polish wood. So she washes the cabinets with soapy water, then dries and polishes the kitchen cabinets with orange oil. Kate takes great pride in doing this job well and seeing the wood gleam when she is done. Some well-earned recognition from me goes a long way, too!

I discovered my daughter Emily likes dusting. This is a job I hate, so when I realized she liked it, she became my main duster! I got her a feather duster, which is fun, and she happily dusts furniture, bookshelves, etc.

Kyle likes to vacuum the stairs, and Jacob loves to clean the pool and do yardwork as long as he has company. We all have our strengths. Of course, my favorite job is organizing drawers, cabinets, the pantry and clearing off counters. J

The best advice I can give: start where you are. If your kids are older and you need help, start training them to do work they are suited to. If they are young, see what they are interested in helping you with, and let them (with supervision). This is a great investment in their future. You will never regret teaching your kids to work. They will contribute to your home, family AND become productive, independent adults.

     And that is important because everyone likes to feel needed.

Resources for parents:

https://www.vickihoefle.com/

Parenting with Love and Logic by Foster Kline and Jim Fay

Blog:  www.efficientspacesco.com/?s=10+tips+for+better+family+time

http://monicaswanson.com/category/parenting-and-family/

Is an Organized Garage Possible?

Plus, 11 easy things to Purge RIGHT NOW

The right side of the garage, full of tripping hazards.

The left side of the cluttered garage.

It’s that time of year again, when people get the urge to organize their garage. The weather cooperates and it’s easy to get to the dump or the recycling centers. I’ve been working in garages for years. There’s one I am particularly proud of.

The man I worked for, Steve, did not care if his house was organized; he spent most of his retirement time in his garage. Junk and projects had piled up and he was in a pickle, so he called me in.

Soon, we had everything sorted—literally! Metal went to the trailer to get hauled away, all his small tools had a home, and he could now get to his large tools without tripping or having to move a bunch of other large tools which were in the way.

This organized Garage brought to you by Efficient Spaces organizing!

See how easy it is to get to the large tools now.

How did we do this?

Step by step.

First step: Start in one corner of the garage and work your way around.

If the entire garage is full and there is not enough room to move, it is time to call me, by the way.

Second step: As you work, sort like items into piles.

For example, small power tools like drills and sanders can go into a box, or onto the top of a workbench until you find a “home” for them.

Third Step: Purge. 11 things to purge NOW:

  • Unopened moving boxes (check inside first for valuables)
  • duplicate tools
  • old paint and painting supplies
  • empty cardboard boxes
  • expired food
  • seldom-used sports equipment
  • baskets
  • donations
  • stuff you’ve been meaning to sell
  • damaged camping equipment
  • Broken tools

Last summer, I moved an elderly man who, I bet, never made a trip to the hazardous waste drop-offs in his life. This made it MUCH harder for us to clean out his garage. Luckily, I had organized an office in a local paint shop, Drake’s Paints, and the owner let me drop off all of the old latex paints and stains. They disposed of them properly.

Tip: You can dispose of latex paint yourself. If there is a little paint left in the can, put some kitty litter in to absorb the moisture, then dump that into the trash. Use the sun to dry out the inside of the can, and throw it away.

Fourth Step: Find a home for your stuff.

Chances are you still have a lot of stuff left. Now it’s time to figure out where it all goes. That is one of my specialties! If you are DIYer, though, just make sure it is clear to everyone in the house where the new spot for everything is. Some “homes” are going to be the same because wherever you stored the gardening supplies really worked well.

Fifth step: Labels are a beautiful thing!

I don’t know if under-labeling is possible when dealing with teenagers. . . or forgetful adults . . . .

And speaking of teenagers: Involve every able-bodied member of the household in the cleanup. It will help them feel invested and less likely to “junk” it up again.

Most of us use our garage to store the things we don’t want to keep in our house, right? Just don’t let it become the dumping ground!

Remember: Maintenance is the KEY to keeping it clean!

A little bit of maintenance every season change is a great idea, and will save you from doing a HUGE clean-out later.

Happy Organizing!

 😉

Help for your Kitchen: Ideas to Use Now

Does your kitchen need help?

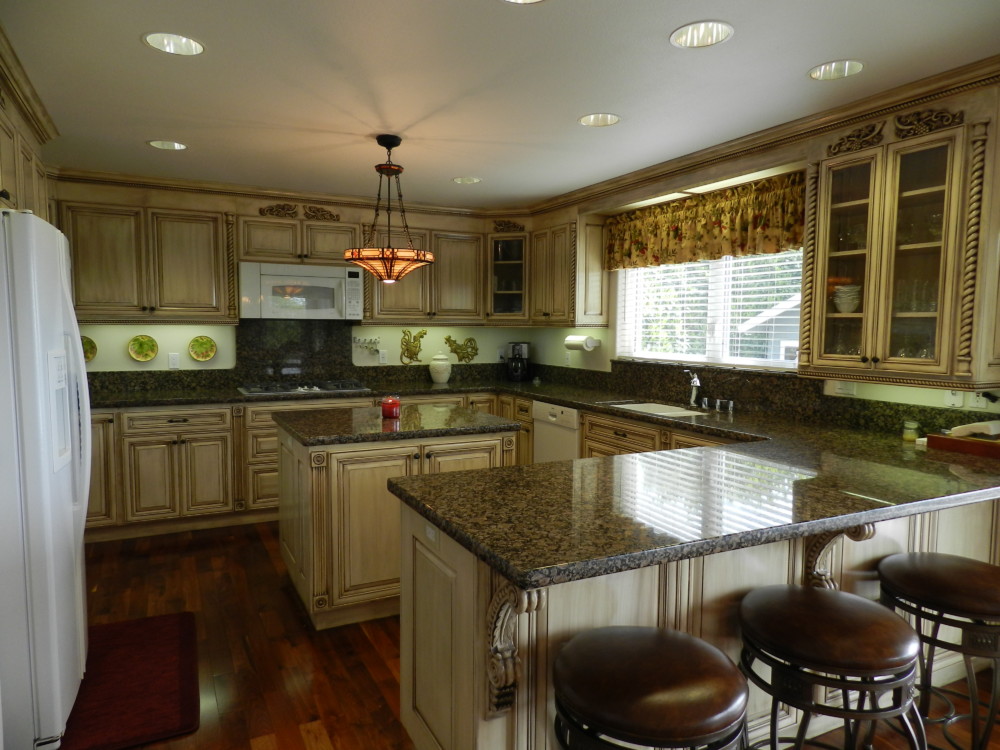
Not a helper to chop veggies or a sous chef—I’m talking organizational help. Looking for kitchen ideas? You’re not alone. In the past couple weeks, several friends have mentioned their kitchen needs work. Well, that’s what I DO, so I’m here to help in the kitchen. Think about the issues in your kitchen. What piles up, and where? Are your cabinets crammed with precarious stacks of bowls, pots and pans, and airtight containers?

As I see it, people have two storage challenges with their kitchen. One, it’s a small kitchen and there isn’t enough space.

OR It’s spread out and has many cabinets, so time is wasted looking for things.

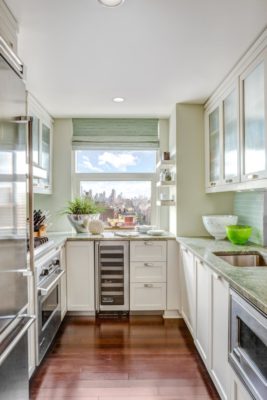
Many people have a small kitchen that doesn’t seem to have enough storage. Apartments, starter homes, and older homes tend to have small kitchens with woefully inadequate cabinet space. In my very first kitchen, I could barely open the oven without hitting our small table! At that time, I did not have many dishes or tools, so it wasn’t an issue.

When I moved into my current house, I had the opposite challenge: too many cabinets. Imagine! After I unpacked my entire kitchen, I discovered I still had a double cabinet standing empty on the fringes. This is a good ‘problem’ to have. I ended up putting clear containers for the kids’ school keepers and art there.

With either situation, here is the best solution: establish a ‘home’ for everything in your kitchen.

Find a safe ‘HOME’ for kitchen stuff.

Appliances, dishes and tools can be tricky.

Ask yourself:

  1. Where am I going to use this item? Take the manual food chopper, for example. I love this tool and use it to chop onions often. But it is an odd size. It doesn’t fit in my large utensil drawer and I don’t want it in with my glasses and mugs. I needed it accessible, so I put it on an open corner shelf meant for knick-knacks near the kitchen sink. It makes sense because I generally chop onions about 1 step away from where it is stored. And as a bonus, the kids—who I regularly assign to chop onions—can see it, so they always put it back in the right place.
  2. How often am I going to use this item? A vegetable peeler needs to be handy, within arms’ length of where you use it, whereas a party platter can ‘live’ far from the hub of the kitchen, in one of the ‘fringe’ cupboards or a hard-to-reach area.
  3. Is this a seasonal item? Some things mainly get used in the summer or the winter. I hardly use my blender in the winter, for example, because I have a food processor and a stand mixer. So I put it away in the winter. Items used for summer parties, like popsicle molds, plastic platters and water-dispensing pitchers get put up high during the winter months. With a small kitchen, these items can be boxed in a clear plastic tote, labeled, and put in the garage or basement until their season arrives.

Eliminate these 5 easy tosses:

  1. Airtight food containers with no lids.
  2. Pots and pans or any item that you’ve replaced, holding onto the old one ‘just in case’ or for camping. Hint: Put it with camping stuff!
  3. Any appliance taking up space on the counter that you rarely use.
  4. Duplicates:  Like platters, large bowls, pitchers.
  5. Any item that is cracked or damaged.

Small kitchen storage ideas

If your stuff is overflowing with dishes, tools and appliances, it’s time to purge. Here is some advice.

First:  Take a hard look at what you have.

Do you use this? Is it really worth the space it’s using up? Is there an appliance you keep because you USED to us it, or one received as a wedding gift and feel guilty giving it away? Let it GO!

Second: Purge the items you don’t use or love.

Take them out of the kitchen. Put them into the garage or, better yet, the trunk of the car to get donated. Place them as close to their ultimate destination as possible.

Third: Put like with like.

Put all the small lids (ex.: canning jar lids) together in a small drawer or container. All airtight food containers go together. I store lids in a separate drawer, contained by a few clear boxes to make them easy to find.

Fourth: Do as much stacking as possible.

Mixing bowls, and even glass 13×9 pans can be stacked with a rubbery mat to keep them from chipping.

Fifth: Stand stuff like pot lids and platters up.

Look at my Pinterest page for creative ideas here. It’s much easier to retrieve platters which are standing up and separated by dowels or a partition. https://www.pinterest.com/jennyrossomorin/kitchen-organizing-ideas/

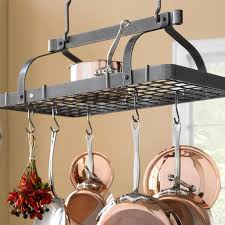
Sixth: A ceiling-mounted pot rack will hold a multitude of pots and pans!

I used one in Vermont, and I loved it. If you need more storage space, look around. Is there an empty bit of wall to install a few hooks?

Seventh: Look inside.

Many people install small baskets inside cabinet doors to hold spices or essential oils. If you don’t want to drill into your cabinets, try sticky hooks. They are very strong and easily removable.

I hope these kitchen ideas help you!

Liked this post? Please share it on your social media of choice! Copy and paste this to share:  https://efficientspacesco.c.wpstage.net/blog/

As always, if you need more help, check out my book on Amazon: Get Organized Quick. It has a chapter on keeping counters clear. With over 100 tips on organizing, it is a goldmine of ideas!

Click here for my book: https://www.amazon.com/Get-Organized-Quick-Minutes-Organize-ebook/dp/B01KKY30TS/ref=sr_1_1?ie=UTF8&qid=1524229138&sr=8-1&keywords=get+organized+quick 

Resources: 

https://www.diynetwork.com/how-to/rooms-and-spaces/kitchen/8-ways-to-make-a-small-kitchen-sizzle. Photo credit for galley kitchen image.

Pot rack image courtesy Bed Bath and Beyond.

Halloween pumpkins carved

Scary Spaces

Scary Spaces

Do you have a frighteningly disorganized space in your house, business or garage? A kid’s bedroom, the laundry room, the fridge? Have you ever opened the door of a room, cringed, then quietly closed the door and snuck away? Many people have a “junk” room in their house, which becomes a dumping ground for anything they don’t know what to do with. And let’s face it—there’s a lot of stuff that fits that description. Scary.

A frightening room

A recent organizing client of mine has just such a scary room. She wants to have her brother come visit her, but the spare room is a junk room, with piles about 3 feet high and a tiny “goat path” which allows one to walk about halfway into the room. She is embarrassed by the mess and called me in to make it orderly again. That’s what I do—I take spaces from scary and chaotic to calm and orderly.

I’ve seen a lot of scary spaces over the years and the first thing I tell my clients is: I’ve seen worse. Then I encourage them, tell them I know how to make the piles disappear. It’s not magic, but the method I use works. We work together on the piles, purging and sorting until the room is organized!

See this cool slideshow I put together of scary spaces that I transformed!

[metaslider id=1757]

So, there is Hope, and that’s why I created this acronym for you this month.

How to prevent scary spaces: (This works to fix scary spaces too.)

Have H.O.P.E.

H is for Home:

Everything needs a home. Assign a “home” to everything you use. Whether it be seasonal dishes, food, craft supplies, decorations, wrapping supplies, cards, mementos, etc. they all need a home. This means a place where that item “lives.” For a clean look, choose a spot that’s out of sight unless you use it every day.

O is for Orderly:

Take time to put things away in an orderly fashion. This can be done daily or even weekly, depending on the area. An organized house doesn’t just happen. After the initial burst of energetic organizing, maintenance is the key to an orderly space. Constant Vigilance!

 P is for Procrastination:

Stop procrastinating any purging and organizing you need to do. If you have piles, tackle them ruthlessly! Remember to be ruthless, not reckless when you purge. Then quickly get those things out of the house and to a thrift store or the trash. I’ve noticed sometimes things that have been discarded end up back in the house. This is why I take all donation items with me when I leave each client’s home or office.

E is for Evaluate:

Be cautious and evaluate where something will fit in your home before you even buy it. Clothing, kitchen appliances, or other toys apply. Thinking about buying a large piece of equipment? Will it fit in your garage or could you rent it instead, or borrow your friend’s? Offer to help them with a project or bring them some homemade bread or get them a gift card as a thank you.

Last tip: Labeling is a good idea if you share the space with your family or ro
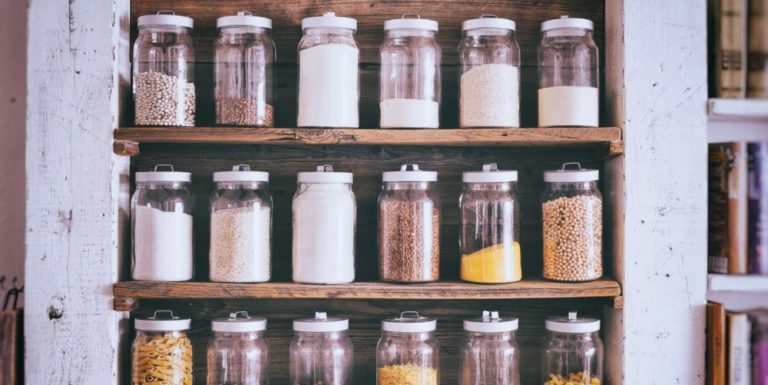
ommates. Once you’ve created a home for everything, take a labeler or some sticky tape and a marker, then go label happy! It doesn’t have to be a beautiful, perfect labeling system like you see on Pinterest, as long as you can read it, that’s all you need.

If you’re daunted by a scary space in your home, remember to apply HOPE to your life. The chaos will become order. It’s not magic, but sometimes it seems miraculous when you enjoy the final result: an organized home with everything in its place. Now you can rest in peace.

Good advice for letting go as you downsize

8 Great tips to Let Go

I recently spoke at a senior fair about downsizing. When I asked everyone ‘what is the hardest thing about downsizing?’ many answered: the memories. Another reply that resonated: the decisions.

When downsizing is a must, the time to let go of some memories has come. I know a lot of clients who save things from their children’s childhood and high school years. This is a burden for most parents, because it sometimes fills an entire room in their home.

Other times, the mementos that get saved are family heirlooms like furniture, quilts, and photos.

It is difficult for most of us to let go of possessions which stir memories. I think some of us grow more sentimental as the years pass. I know it’s hard, but sometimes has to be done, especially if you need to move to a smaller place. To make it easier, I have some advice that has helped my clients.

How to let go

  1. Ask yourself: ‘Why am I keeping this? Does it mean anything to me?’
  2. Ask yourself: ‘Do I use it?’
  3. Ask yourself:  ‘Do I love it?’ And if so, do you display it somewhere so you can enjoy it, or is it packed away in a box?  If you don’t use it or love it, let it go.

From a recent article, Organizer Jodie Watson shares her favorite trick. “In any given category, let’s say artwork that you have hung on the wall, ask this question, ‘If I could only take three pieces with me, which three would they be?’ With books, the question might be, ‘If I can only take 20 with me, which 20 would they be?’ This will help you discover the ones that are more meaningful than the others. These are the ones to take with you, the rest are negotiable.” (Watson owns Supreme Organization)*

  1. Be ruthless, not reckless. This means getting rid of all the paraphernalia from a craft you don’t do any more. Or, be ruthless by getting rid of ALL your old magazines. An example of being reckless would be to get rid of an entire box full of things without quickly looking through it. There might be money or a piece of jewelry inside. One of my clients found a check for 300 dollars in a box of old mail and magazines!
  2. Stop saving things for children or grandchildren. You are not the family’s storage unit! Plan ahead by asking children what they would like to have from their mementos and your house. Then you know you can let go of the rest of their stuff, because it is not important to them. Box up what they want and ship it to them, or give them a few months to come and get larger items.
  3. Let go of gifts from others that aren’t bringing you enjoyment. It’s hard to do sometimes. But just because someone gave you a gift doesn’t mean you need to keep it forever. Ask yourself, ‘Does this have a future with me?’ Remember the love is in the giving; you received it with gratitude, and enjoyed it but don’t need it any more.  Your friend wouldn’t want you to be burdened with toting around that gift for the rest of your life!
  4. Make it easier to let go by having a favorite charity or thrift store to donate to. Many hospitals run a thrift store, and the Gospel Rescue Mission helps people get back on their feet. Picture someone enjoying those shoes or that extra winter coat you don’t need any more! Visualizing this will be very helpful when you are letting go. And don’t forget to get a receipt when you donate. It is helpful to jot down a quick description of what you’re donating so at tax time you can get an estimate of the value. For example, I usually state how many bags of clothing I donate, and mention larger items specifically.
  5. Get help. If you find you want to keep everything, here’s a great trick. Invite a friend to come over and help you. Have them hold the item, then you decide by just looking at it whether you will keep it or let it go. Many times, touching an object like a book or a sweater will cause you to feel more attached to it.

If you’ve tried these ideas and you’re still having a hard time letting go, this means you are “stuck”. It is a good time to look into hiring a professional organizer to help you. Organizers are skilled in helping people come to decisions that they will be happy with. Downsizing is much easier and less stressful with a professional to guide and assist you. You may even start to enjoy it!

 Good things to keep:

  • Important documents like deeds, wills, medical records, birth and death records, marriage licenses, divorce decrees, social security cards, pension plan docs, insurance policies, passports, power of attorney docs, investment records, education records, genealogy records, diplomas, military service records and vehicle titles.
  • Family photos. Keep antique photos, and if you have mountains of family snapshots, scan them and keep them on your computer and on a backup disk.
  • Basic kitchen supplies.
  • Emergency supplies like first aid kits, an extra blanket for the car, etc.
  • Journals and a reasonable number of favorite books.

*Resources:

http://www.housebeautiful.com/lifestyle/organizing-tips/advice/a3173/never-throw-out-when-downsizing/

link to Jodie Watson’s webpage: http://www.supremeorganization.com/wordpress1/

Earth Day Radio show!

Woo-hoo, my Radio Debut!

Back in February, Aletha Nowitsky of KSKQ radio Ashland called and asked me to be on her radio show. On Earth day, April 20, we recorded a live show. Pretty exciting for me, really. I share some of my stories and some great info:

  • How I got started
  • What a session with me is like
  • Jenny’s thoughts on Marie Kondo
  • What does clutter say about you?
  • Plus, many success stories from clients

Click on the play button above to hear the ‘Innerview’.

Feel free to share this page on your social media! It’s easy, just click on Pinterest, FB icons hovering at the lower left of your screen!


Space saving ideas for a small laundry room: Tips to make it a pleasing place to be

So, I’ve noticed a trend among my clients and friends lately. A laundry room trend. Several of them are organizing it,  remodeling it, or WANT to remodel it. Most of us have small laundry room, so here are some great ideas how to make the most of your space.

Space saving Ideas for a small laundry room

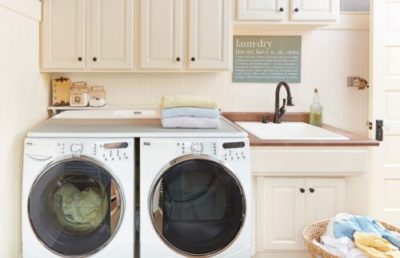
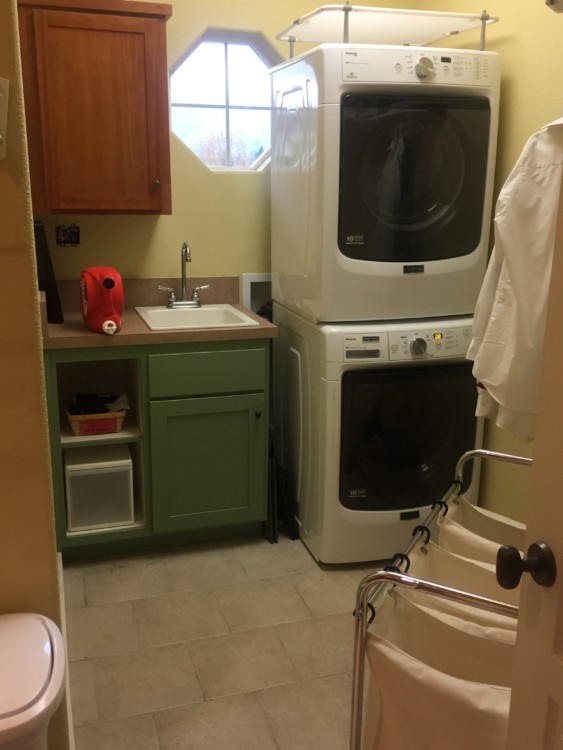
Last year, I remodeled my laundry room. Quite a process. I thought it would be this easy little project. Wrong! A lot goes into a laundry room, literally. I started out with my inspiration: a picture I clipped from a magazine.

Sure, it wouldn’t be hard to get that look in my little laundry room? It is little, it measures 10 x 6. And it’s an odd shape, with a weird angled wall.

Space saving idea #1 Get stackables if you can.

This enabled me to have room for a laundry sink which – gasp – mine didn’t include. Getting a sink in there was my main motivation for remodeling the room.

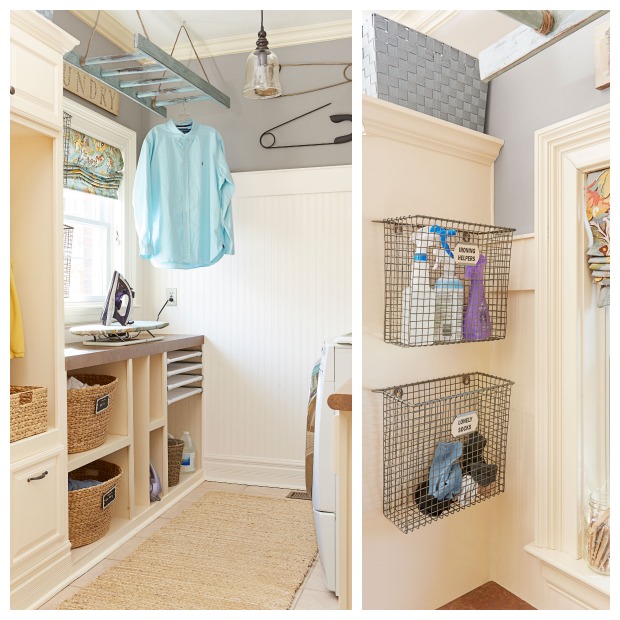
Space saving idea #2:  Utilize your wall space.

When I looked up, I noticed all the space we could use on the walls. Things I installed on the wall:

  1. An expandable drying rack.
  2. A shelf for large items.
  3. A closet rod to hang delicates, white shirts, etc.
  4. Don’t forget the back of the door! A good place for a hook or even a towel bar (with some hooks or clothespins) for some air-drying.
  5. A cupboard or open shelf to hold detergent and cleaning supplies.

Other ideas for laundry room wall space:

  • Cute square baskets for small laundry supplies.
  • Large hooks.
  • A retractable clothesline (see the picture on my Pinterest page: https://www.pinterest.com/jennyrossomorin/organized-laundry-room/
  • Hang the ironing board and iron on a nifty rack installed on the wall.
  • If you have side-by-side washer & dryer, install a shelf directly over them to hold cloths, detergent, etc.

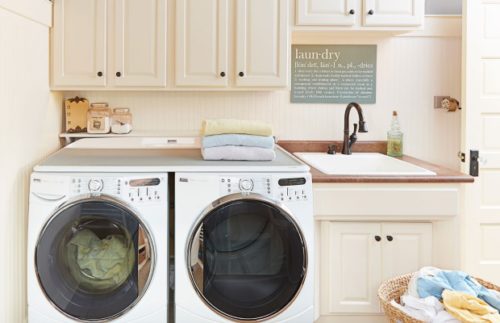
Don’t forget the ceiling!

One idea I love is to hang a painted ladder from the ceiling and use hangers for air-dry items. Others hang sweater dryers or even decorative items like washboards or eye-catching pendant lights from the ceiling. It can look cute even if it’s a laundry room!

I do this. I got a few stackable drying racks at the Container Store.  A little assembly is required, but it is easy. And Voila, dry 2 or 3 sweaters right there in your laundry room! I used to have to dry one sweater at a time on my cedar chest in my room. Those days are over.

Part II Declutter your laundry room

I’ve noticed more friends and clients lately are frustrated by waaay too much clutter in their laundry room! I worked for one Mom a month ago whose laundry room was a catchall for all kinds of clutter. And another client said hers is a sore spot, too.

What can be done? Well, if I was in your laundry room, first of all, take off my blindfold, and then I would look around. Remember, a little planning can save you a lot of work in the long run. So, my first action as an organizer: I would notice what is piling up. In fact, this is the first question I would ask you:

  1. What kinds of clutter is piling up? 
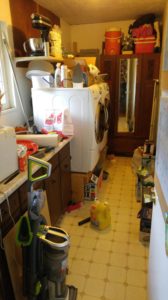
Just notice and jot down what stuff is lying around on your washer, dryer, the floor, and any counters in there. What do you have too much of? Whatever you don’t have a place for ends up as clutter, so give it a home. And if your answer was too much laundry . . . I do too!
  2. What is in here that doesn’t belong? Remember that awesome Sesame Street song: One of these things is not like the other . . .  Well, that is a great guide to help you sort out the things that don’t belong in your laundry room. Items like kids’ shoes, golf balls, toys, vacuum, kitchen appliances, baseball gloves and other sports equipment, tools, et cetera, et cetera. All the random stuff that doesn’t have a “home” in your home ends up getting dumped in the laundry room.
  3. Get Ideas. What’s the best place to find solutions to your clutter pileups? Pinterest, of course! So many great ideas for lots of life’s clutter dilemmas. 
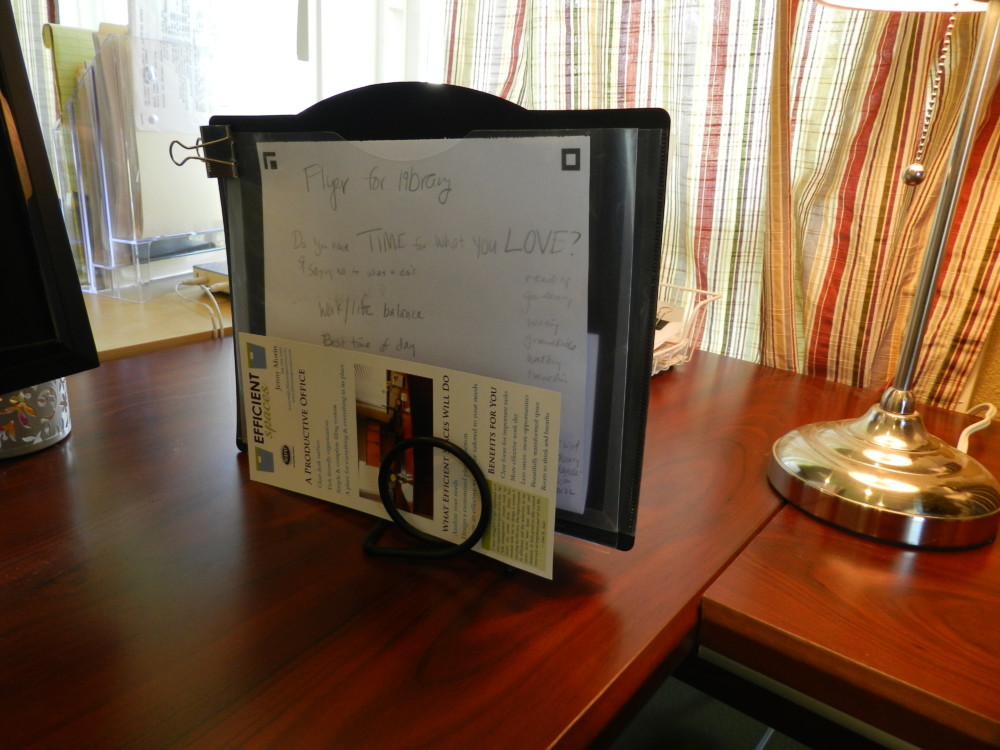
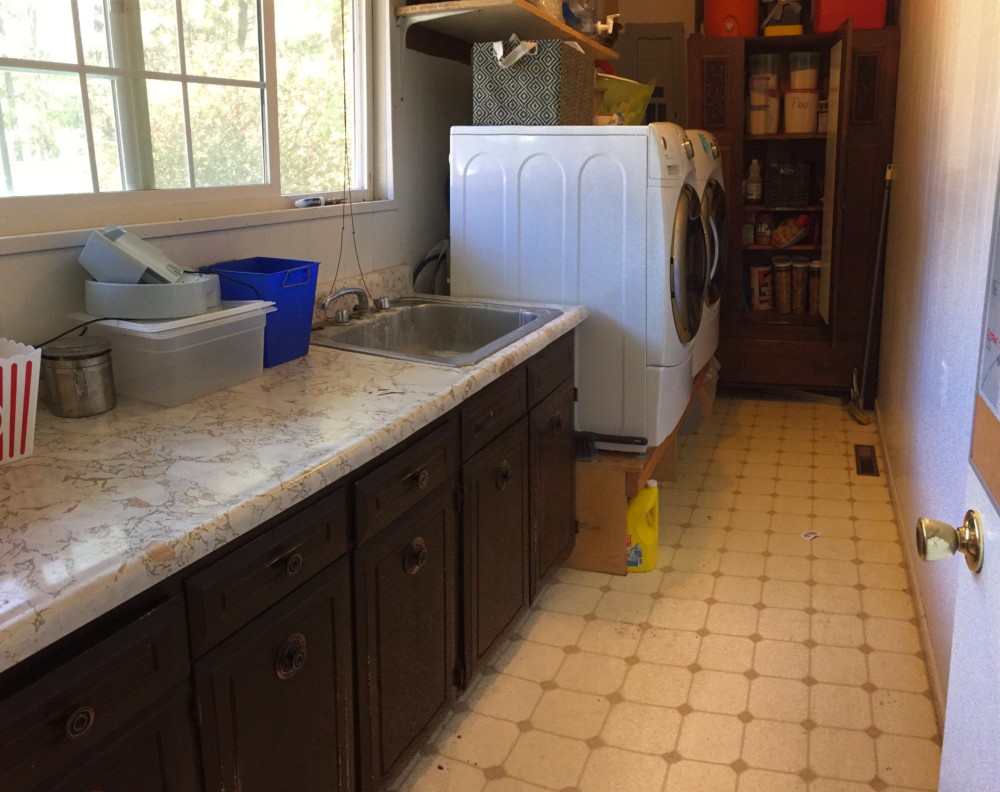
Collect some pictures for inspiration. I actually stumbled across my dream laundry room in a magazine while in a waiting room. A link to the article is in the Resources section. Also, search for solutions to your unique issues. Just use your search engine and see what pictures come up. You will be amazed!

Click here to follow my Pinterest board: https://www.pinterest.com/jennyrossomorin/organized-laundry-room/

  1. Ideas to make it easy for the kids:

    First, train them how to do their own laundry. A little bit of training will save you hours of work later on! Try having a basket for each child’s clean laundry. Also, have a laundry sorter. Label it whites, darks and mediums as a guide. On the wall by the washer, I have a sign telling what temp different colors get washed in so they can do their own laundry with confidence. To make it easy, I have the laundry soap sitting on the counter beside the sink so everyone can reach it.

  2. Decisions, decisions

Yes, you must decide level of organization you want. Open shelves or closed cupboards? Decide how many bottles of detergent you need, how many cleaning cloths. We end up storing some of our lightbulbs and other cleaning supplies in our laundry room cabinets. But if I buy too many as a “backup” they will end up overflowing. So be careful of that!

How many towels, rags, etc. Do you have a place for everything that needs a “home” If not, create one.

6. How much time are you willing to spend organizing your laundry room?

This is going to be different for everyone. If you have plenty of time and the right skills, DIY is a good idea. If time is short, and/or you’d rather have a tooth extracted than organize, seek help from a professional. Many professional organizers have a good eye for design or know a good designer, if you want some advice there.

If you follow these instructions and still need more help, or get stuck, or if you need more than just You on the job, consider hiring a professional organizer!

Resources:

Click to see more great ideas on Pinterest: https://www.pinterest.com/jennyrossomorin/organized-laundry-room/

To see the article that originally inspired me: http://www.goodhousekeeping.com/home/organizing/tips/a25464/organized-laundry-room/

Productivity Secret: It’s not Sexy, but it’s Smart & Savvy!

Q: When an organizer procrastinates, what will she be doing?

A: Organizing her desk or her closet.

We are one month into the new year. You are still feeling the energy to make changes in your office, but maybe not quite sure how to start. I am here to help!

The Urge to Purge

A project I love to do at the beginning of the year: cleaning out my office files to start fresh for the new year. My friend Susan McKenzie, who is a feng-shui designer, tells me when you make room for new clients they will come. You have to allow some space in your life for new opportunities.

I know it’s not sexy, but we all need to do it: the file purge. I have been feeling the urge to purge these last few weeks. It’s true that when files move freely in the drawer, it is much more likely that I will file my own paper. I know it works with clients too; they always want to use their new and improved file system after we have set it up. It gives me great satisfaction to know I’ve helped yet another person to be organized and find what they need quickly.
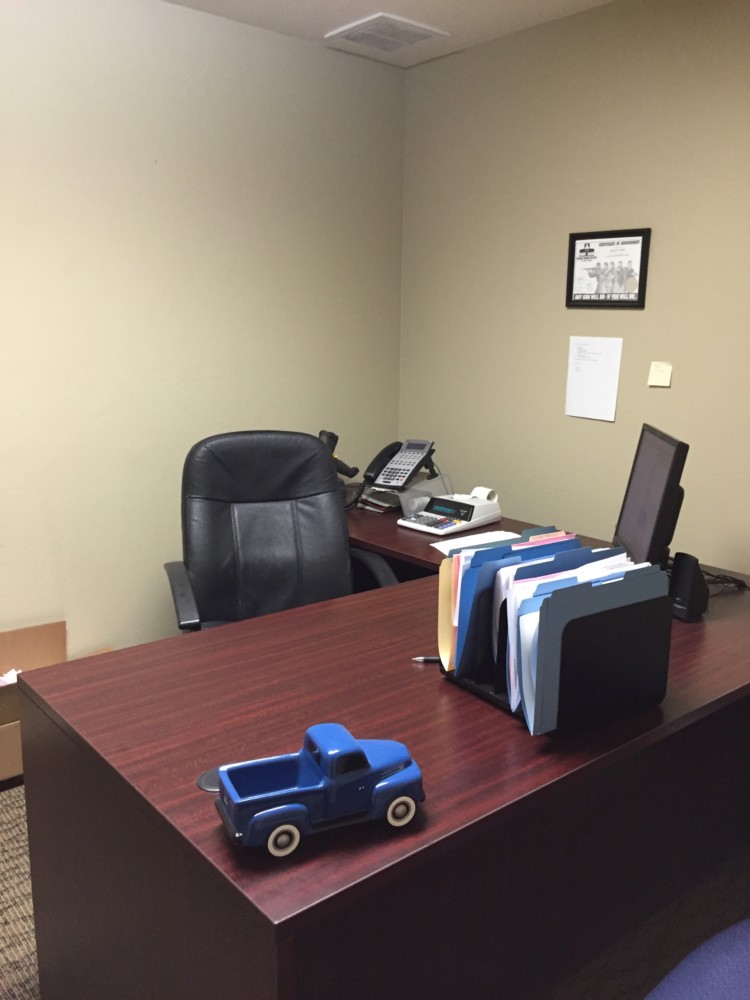
Sit back and envision a filing system where your files move freely and easily, you can see each file tab with the topic or category, and easily slide papers into their proper place? Even better, when you need information FAST about that client you spoke with last week, instead of frantically searching through the papers or notebooks or Post-its cluttering your desk, you will know exactly where it is and be able to quickly review the conversation. Talk about reducing stress!

How to get from where you are today to that level of organization, though? There’s no secret formula. And I don’t have a magic wand to whisk away the clutter. Just elbow grease!

Like I said, not sexy, but purging does wonders for any surface, any drawer, any home or office.

From Piles to Files

Now, when I work with a client I think of myself as a clutter counselor. I am coaching each person to decide what to do with their clutter. Training him/her on what to do with each piece of paper. Sometimes it is slow going at first, but after a little bit they get to the point when they see, say, an insurance document similar to one we’ve come across before, they know if they should trash it or file it. Of course if there is any doubt, I am there to guide them. Along the way, we are constantly setting up new files.

A recent client Southern Oregon needed some help with her home office. Her life was so busy, she did not have the time to set up systems for the different businesses she and her husband own.  She did have some great files set up, but an unskilled assistant filed things in weird places. So ‘Abby’ could not find them. Once we set up systems to keep her desk free of clutter, and went through her files, she breathed a sigh of relief. Now she knows that everything is within reach, and that she will find what she needs quickly and easily.

So as a clutter counselor, here is some free advice: a large percentage of papers you file never get referenced again. Think hard about whether you will ever look at that information again.

Purging

Ask yourself these questions:

  1. Do I use this?
  2. Will I ever need this information again?
  3. If so, is there somewhere else I can get it?
  4. Will I remember where it is; does it fit in the category it is filed under?

This brings me to what I call file laziness. Instead of creating a new file for a new kind of information, you talk yourself into believing you will remember you filed your Notes on a new client inside the receipts file. You may think ‘I’ll just put it here for now; it’s only a couple pieces of paper. It’s not worth creating a new file. I’ll remember I put it here!’ If any rationalization is going on inside your head as you file it, stop right away, pull out a new hanging file, label it.

To prevent file laziness, I keep a hanging file in the very front of my most-used drawer, with plastic tabs and white file labels inside. New hanging files sit just behind it. This makes it easy. Then I am bound to use these when I need a new category or add a new client. You see, since I made it super easy for myself, I will create that new file when I need it instead of misfiling something or combining it with info it has no business being combined with.

So start the year off right with purging your files! You can pace yourself and just take 4 files a day or even 1 a day to go through. It will be worth it! You’ll be able to see labels clearly, file and retrieve your documents easily! Opening your file drawer will give you satisfaction instead of dread.

And if you need help, just call on me!

Please let me know if this post helped you! Click on this link to my FB page: http://www.facebook.com/OrganizingAttics2Basements/?pnref=lhc

Link to designer Susan McKenzie’s website: http://suemac2.houzz.com/

1 2 3 4
Privacy Settings
We use cookies to enhance your experience while using our website. If you are using our Services via a browser you can restrict, block or remove cookies through your web browser settings. We also use content and scripts from third parties that may use tracking technologies. You can selectively provide your consent below to allow such third party embeds. For complete information about the cookies we use, data we collect and how we process them, please check our Privacy Policy
Youtube
Consent to display content from - Youtube
Vimeo
Consent to display content from - Vimeo
Google Maps
Consent to display content from - Google
Spotify
Consent to display content from - Spotify
Sound Cloud
Consent to display content from - Sound
Schedule a Free Call