Schedule a Free Call
Jenny Morin

The Climb

This spring, I wasn’t in tip-top shape. Even though I exercise 3x a week at the gym, I lacked stamina. So, when the trail dried out enough, Frank and I started hiking Dollar Mountain, a short walk from our home. I knew it would take conditioning to reach my ultimate goal: to reach the tower, about 3 miles round trip.

Now, a short walk sounds deceptively easy, but the walk TO the hill is one of the toughest parts. It resembles a ski slope in steepness.

So, I started small.

My first milestone: to walk uphill for 45 minutes.

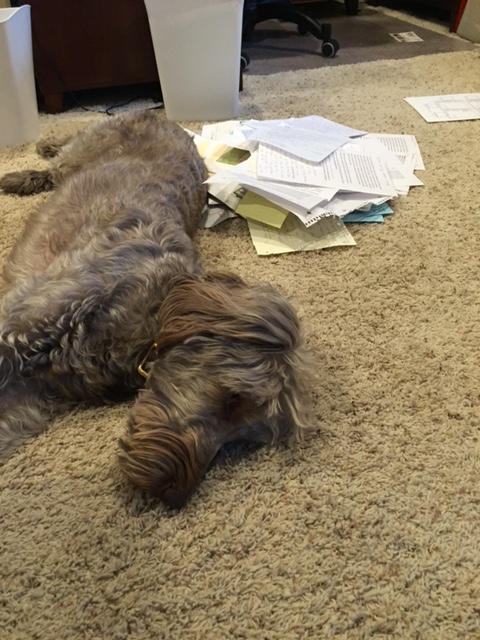
That first day, I huffed and puffed along the way. I have trained my dog Bella to pull me up the hill, which helped. (No, that’s not cheating!) Frank’s encouragement made a difference, as well as my competitive spirit to keep up with him.

The next time we climbed, I wanted to make it farther, to the gravel pit. But time constraints (a morning appointment) kept me from getting there.

To me, the gravel pit represents the halfway point, even though it’s more than halfway. That’s where the grueling final steep climb starts, about half a mile of steep gravelly slope. It’s also where I see the best views of countryside.

The Second Milestone: Reach the gravel pit

Next time we climbed it, I managed to get to the gravel pit. A small celebration for reaching the second milestone.

Then I didn’t hike it again for over a week and lost my momentum.

Today started out different. I told myself I would make it to the top. I had a good night’s sleep, my legs were rested, and the temps were just right—in the 50’s-60’s.  (OBSTACLES REMOVED)

Frank, Bella and I started out well, though he had to wait for me a bit, the first steep climb up TO the trail seemed easier. I made sure to keep up Bella’s training to pull me up the steepest parts, which is just enough of a pull to give me that ‘extra push’.

I enjoyed the view as I caught my breath at our traditional resting point, which is the steepest bit of trail, near the beginning of the climb. From then on, the uphill isn’t as steep until the very end.

So, the trail goes up and down a bit in the next part, with some nice vistas of our green wooded hills and lots of birdsong. We enjoyed a companionable silence. As we came around a bend, the tower we’re aiming for came into view. With encouragement from Frank, and a quick conversation with my best friend, I made it to the gravel pit. By then Frank and I were deep in conversation, and I almost didn’t realize it as we started up the steep gravel slope.

The Final Push to the top

As soon as I started to think how hard it is—right about the same time my glutes are burning, that’s when it starts to FEEL difficult. It’s amazing how the distraction of our conversation at the start of the gravel slope made the hill feel less difficult. I had Bella’s help on the final steep climb, though. Her little tug is just what I need to propel me to the top.

And YAY we are HERE! Touch the wire fence around the tower, because that makes it official (at least that’s what our kids tell us).

I bask in the morning, enjoy the view with my sweetheart, and gratitude fills me up. I did it!

Parallels in your climb to a goal:

  1. Tell me what ya want (goal)
  2. Get movin’
  3. Kick any obstacles in the hiney
  4. Party
  5. A little help from my friends
  6. Keep the tower in your sights
  7. Keep movin’ on up
  8. Reach the peak
  9. Celebrate!
  10. Give gratitude

Questions to think about:

What would have happened if Jenny made the goal to climb to the top the first day she hiked it?  Setting an unrealistic goal will be discouraging if not attained.

What knowledge about myself is pertinent to planning how to reach the goal? This will be different for everyone. Ex: Jenny knows she will not push herself to the point of pain just to reach the top on the first day. She doesn’t like being sore for days afterward.

What obstacles do I face along the way, or perhaps even before I start?

Are there natural milestones on the way to my goal that I can use to mark my progress?  A time, like a month, a distance, an accomplishment?

Who or what will motivate me along the way? Do I need encouragement, competition, a partner, etc.?

What assistance will I need to reach this goal? I had Frank encouraging me and Bella pulling me at times.

Do I have the knowledge or skill I need already? Or:  What do I need to develop or learn to reach this goal?

Who do I know that has done something similar to what I am planning? Will I ask them to mentor me/ answer questions to help me along the ‘climb’?


Ideas to make family time better

Tips for better family time

Are you interested in creating more enjoyable, rewarding family time? I just discovered a great resource for parents, with an emphasis on Dads: a website called All Pro Dad has 10 ideas for consciously creating better family time. As I read, I thought about things my parents did right. Neither one of them had ideal family situations growing up, but they made a happy home for me and my 3 siblings. I’ll get kinda personal and share 3 stories these tips reminded me of.

For those of you who did the quiz on my newsletter, the top 3 tips in order are: Eat together, Read often, and Do chores together.

For better family time:  1. Eat together

This was one of the traditions in my family growing up. My Dad, being Italian, insisted on this. I’m sure both my parents agreed it was important and they made it a priority. In my family now, we have continued this tradition, and it’s some of the best time (and sometimes the only time) we have together each day. Now that we have 2 teenagers, we don’t always manage to have everyone there every night, so it is challenging. A little advance planning goes a long way.

For example, 2 nights a week Emily has spring band practice. On Wednesday night, we eat dinner between the time she gets home and the time we have our 7 pm activity. It’s tight, but we make it work. Also, sometimes we have to eat earlier than normal to get everyone around the table. It’s worth the extra effort to get everyone around the table, talking and laughing together!

For better family time: 2. Read often.

I am a big believer in reading with children and frequent trips to the library, especially when they are young! Kids are naturally curious, and showing them a myriad of books will spark new interests and a love of learning. When my kids were little (and we had more time together) we’d make a weekly trip to the library. We all looked forward to it. And of course, sitting down to read together in the daytime and at bedtime is special time we enjoyed each night. I know one Dad who still reads to his teenagers every night. They’ve progressed way beyond picture books, but what a great tradition!

Story: When I was a teenager, my family would visit our the farm where my grandmother grew up in North Whitefield, Maine. It had no electricity, so at night my Mom (who came prepared) read to us for entertainment. I distinctly remember her reading a Tarzan novel to us one night by lamplight. The adventure, the drama. You’d think we were too old for that but we LOVED it! What a cherished memory.

It’s these kinds of moments that build better relationships with our children and teens. These activities that don’t cost any money, just time. Time is what we need to give, to whatever activity interests our kids the most.

For better family time: 3. Do chores together.

They might whine and complain for the first few minutes, but if you are willing to spend the time with children to train them, to show them how to clean or stack wood, they will come to enjoy it. When the kids are young, they want to be like Mommy and Daddy. They see us doing dishes or using the vacuum, and they want to try it. Let them! Show them how to do simple jobs when their interest is piqued.

And if your kids are already older, it is not too late. Sit them down and explain:

“Your father and I have done you a disservice. We have been doing everything for you up until now. But if we continue like this, you won’t know what to do when you get on your own in __ years. It’s time to learn how to ______  and _______ so you aren’t helpless when you get your first apartment/ go to college/ get married.

Plus, is it really OK for the Mom or even both parents to do the lion’s share of work in the home? Parents today have less time than ever. It’s important to get the kids involved in keeping the home clean, the family fed, and the yard maintained. It’s the way life works. I don’t know any employers who would react well to the statement:  “I’ve never done that, can you do it for me?”

Story: I mentioned stacking wood earlier. That brought back a memory for me. My Dad, a forester in Maine, loved to give service, especially to widows. One night, he informed us we would be going to split and stack firewood for a widow at church for our family night activity. At first, we whined and complained, (especially when we saw the mile-high stack of wood we had to stack!) but once we started working, we began to really enjoy it. My hyper younger brothers had something to keep them busy and focused. Best of all, we got our Dad’s undivided attention for several hours, which was rare during our childhood. That night we worked together remains one of my best childhood memories. In fact, it was our most memorable family night ever.

Lessons learned: serving and helping as a family is especially rewarding. Teaching kids how to work is important, and they learn while they are young that it’s just part of being a family.

Read the full article: http://www.allprodad.com/10-tips-to-better-family-time/

Tell me what YOU think! Is it ok for the Mom or even both parents to do the lion’s share of work in the home? What was the philosophy on pitching in while you were growing up in and how did it help/hurt your future family?   https://www.facebook.com/OrganizingAttics2Basements/?pnref=lhc

Did you like this article? Click Here to subscribe to my newsletter!  https://efficientspacesco.c.wpstage.net/660-2/

Also, on my Pinterest page, I’ve posted some creative ideas for chore reminders and rewards.  Click here to get great ideas: https://www.pinterest.com/jennyrossomorin/kids-and-parenting/

Until next time, bye!   Jenny

Resources:

http://www.allprodad.com/10-tips-to-better-family-time/

Another great resource is parent educator Vicki Hoefle.

http://vickihoefle.com/tools-success/

Art:Picture of boy with firewood courtesy VisualHunt.com

Earth Day Radio show!

Woo-hoo, my Radio Debut!

Back in February, Aletha Nowitsky of KSKQ radio Ashland called and asked me to be on her radio show. On Earth day, April 20, we recorded a live show. Pretty exciting for me, really. I share some of my stories and some great info:

  • How I got started
  • What a session with me is like
  • Jenny’s thoughts on Marie Kondo
  • What does clutter say about you?
  • Plus, many success stories from clients

Click on the play button above to hear the ‘Innerview’.

Feel free to share this page on your social media! It’s easy, just click on Pinterest, FB icons hovering at the lower left of your screen!


Mother’s Day: What does Mom really want?

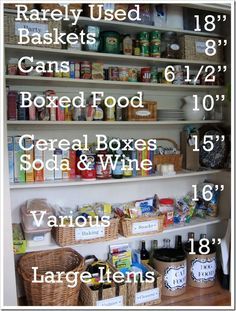
What does a Mom really want for Mother’s Day? (It’s not chocolate.) How about something that will last: an organized pantry!

If the pantry has gone all winter and spring without a tidy, it definitely needs one now. So, for all you mothers out there, print this article and give it to your kids. This will the Best Mother’s Day present ever!  Inspiring pantry organization, yes?

Mothers, be sure to let your kids know you don’t expect the pantry to look exactly like this; the only thing that matters is how easy-to-use and effective it is. You want to be able to find the food or ingredient you are looking for without searching for hours. You could even do this project with your kids Mother’s Day weekend, and teach them a useful life skill!

Pantry Organizing steps for Mother’s Day:

  1. Make a plan
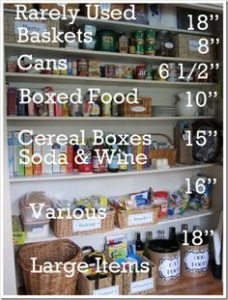
. Have a picture to guide you, and use this handy organization tool on my Pinterest board for ideas on where to put foodstuffs.
  2. Gather your supplies: A radio, a footstool, a metal bowl with dish soap and warm water, a cotton cloth, white vinegar, an absorbent towel, Post-it notes, a Sharpie, painter’s tape, and a labeler. You’ll need a box for food donations and trash can for expired food.
  3. Make it fun! Rock out to your favorite music. You can even work with a teammate: many hands make for light work.
  4. Clean it. Take everything off one shelf, look for expired items or foods you don’t like. Put them in the ‘circular file’ or food pantry box. Then wipe off the shelf with soapy water containing one tablespoon of vinegar.
  5. Organize food by zone: snacks, lunch supplies, powdered drinks, cereals, pasta, soups, etc. Now, take some painter’s tape and make temporary labels for the zones you’ve planned to make on the shelves.
  6. Sort it:  Place items that fit your zone back on the shelf, but the others will stay on the counter for now. Use a Post-it (or scrap paper and tape) to label your “zones” while they are still on the counter. Gathering similar items together on the counter makes it easy to see how much space you’ll need in your pantry shelves.
  7. Put stuff away: Work your way down, emptying each shelf and cleaning it, then replacing the food in its “home” or zone, according to your plan.
  8. Time to Label! This is the fun part, for kids love labeling. Here’s an idea to save labeler tape: type all of your label names (pasta, nuts, etc.) all in a long label before pressing print. This way, you won’t have lots of wasted white space on your tape.

Ideas for Pantry Problems:

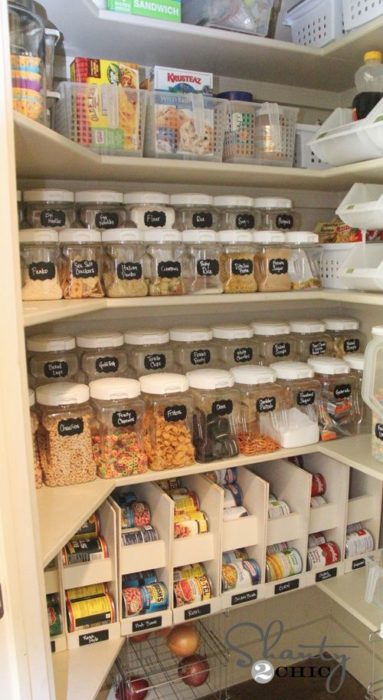
  • Try creative solutions for the deep corners in your pantry. I measured them, then ordered a few Lazy Susans to fit. Now they hold cans and jars. Just need to spin it to see what you have!
  • What to do with the chips? Well, my Pinterest board has lots of ideas for this pantry dilemma. The easiest idea so far: use self-sticking plastic hooks (like 3M) directly attached to wall space, in a neat vertical line. Chip clips have a little hole in them, so they will easily attach.
  • Maximize can storage: Most pantry shelves have 10-12 inches of headroom. To maximize storage, I bought a wire shelf so I can double stack cans of soup and vegetables.
  • Give your cleaning tools a home: If your broom and dustpan are hanging out on the floor, take fifteen minutes and install a tool organizer on the wall. I actually hang my duster and steam mop from it as well!

Safety Tip: Install a fire extinguisher to the pantry wall. Kitchen fires are a hazard, and it pays to be prepared! Teach your whole family how to use it so you’re ready for an emergency.

Resources:

Click to see more ideas on my Pinterest page:  https://www.pinterest.com/jennyrossomorin/organized-kitchen/

Space saving ideas for a small laundry room: Tips to make it a pleasing place to be

So, I’ve noticed a trend among my clients and friends lately. A laundry room trend. Several of them are organizing it,  remodeling it, or WANT to remodel it. Most of us have small laundry room, so here are some great ideas how to make the most of your space.

Space saving Ideas for a small laundry room

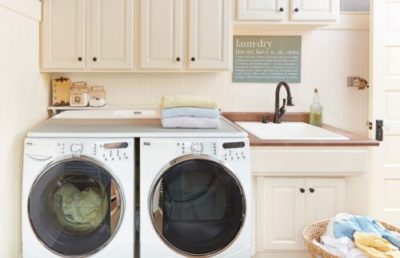
Last year, I remodeled my laundry room. Quite a process. I thought it would be this easy little project. Wrong! A lot goes into a laundry room, literally. I started out with my inspiration: a picture I clipped from a magazine.

Sure, it wouldn’t be hard to get that look in my little laundry room? It is little, it measures 10 x 6. And it’s an odd shape, with a weird angled wall.

Space saving idea #1 Get stackables if you can.

This enabled me to have room for a laundry sink which – gasp – mine didn’t include. Getting a sink in there was my main motivation for remodeling the room.

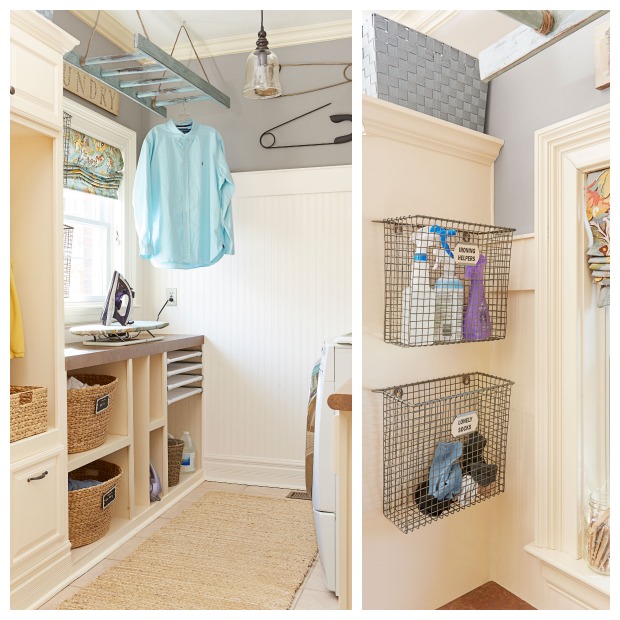
Space saving idea #2:  Utilize your wall space.

When I looked up, I noticed all the space we could use on the walls. Things I installed on the wall:

  1. An expandable drying rack.
  2. A shelf for large items.
  3. A closet rod to hang delicates, white shirts, etc.
  4. Don’t forget the back of the door! A good place for a hook or even a towel bar (with some hooks or clothespins) for some air-drying.
  5. A cupboard or open shelf to hold detergent and cleaning supplies.

Other ideas for laundry room wall space:

  • Cute square baskets for small laundry supplies.
  • Large hooks.
  • A retractable clothesline (see the picture on my Pinterest page: https://www.pinterest.com/jennyrossomorin/organized-laundry-room/
  • Hang the ironing board and iron on a nifty rack installed on the wall.
  • If you have side-by-side washer & dryer, install a shelf directly over them to hold cloths, detergent, etc.

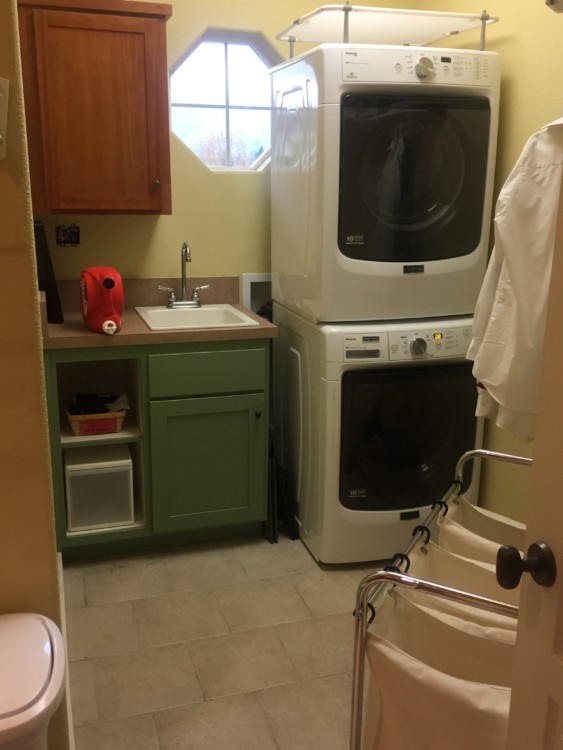
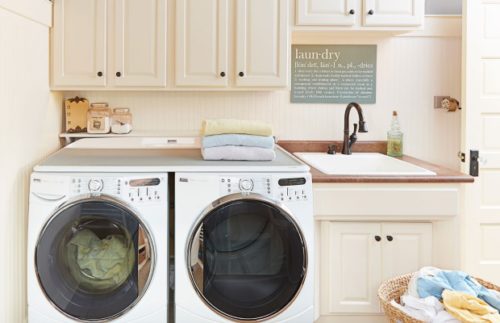
Don’t forget the ceiling!

One idea I love is to hang a painted ladder from the ceiling and use hangers for air-dry items. Others hang sweater dryers or even decorative items like washboards or eye-catching pendant lights from the ceiling. It can look cute even if it’s a laundry room!

I do this. I got a few stackable drying racks at the Container Store.  A little assembly is required, but it is easy. And Voila, dry 2 or 3 sweaters right there in your laundry room! I used to have to dry one sweater at a time on my cedar chest in my room. Those days are over.

Part II Declutter your laundry room

I’ve noticed more friends and clients lately are frustrated by waaay too much clutter in their laundry room! I worked for one Mom a month ago whose laundry room was a catchall for all kinds of clutter. And another client said hers is a sore spot, too.

What can be done? Well, if I was in your laundry room, first of all, take off my blindfold, and then I would look around. Remember, a little planning can save you a lot of work in the long run. So, my first action as an organizer: I would notice what is piling up. In fact, this is the first question I would ask you:

  1. What kinds of clutter is piling up? Just notice and jot down what stuff is lying around on your washer, dryer, the floor, and any counters in there. What do you have too much of? Whatever you don’t have a place for ends up as clutter, so give it a home. And if your answer was too much laundry . . . I do too!
  2. What is in here that doesn’t belong? Remember that awesome Sesame Street song: One of these things is not like the other . . .  Well, that is a great guide to help you sort out the things that don’t belong in your laundry room. Items like kids’ shoes, golf balls, toys, vacuum, kitchen appliances, baseball gloves and other sports equipment, tools, et cetera, et cetera. All the random stuff that doesn’t have a “home” in your home ends up getting dumped in the laundry room.
  3. Get Ideas. What’s the best place to find solutions to your clutter pileups? Pinterest, of course! So many great ideas for lots of life’s clutter dilemmas. 
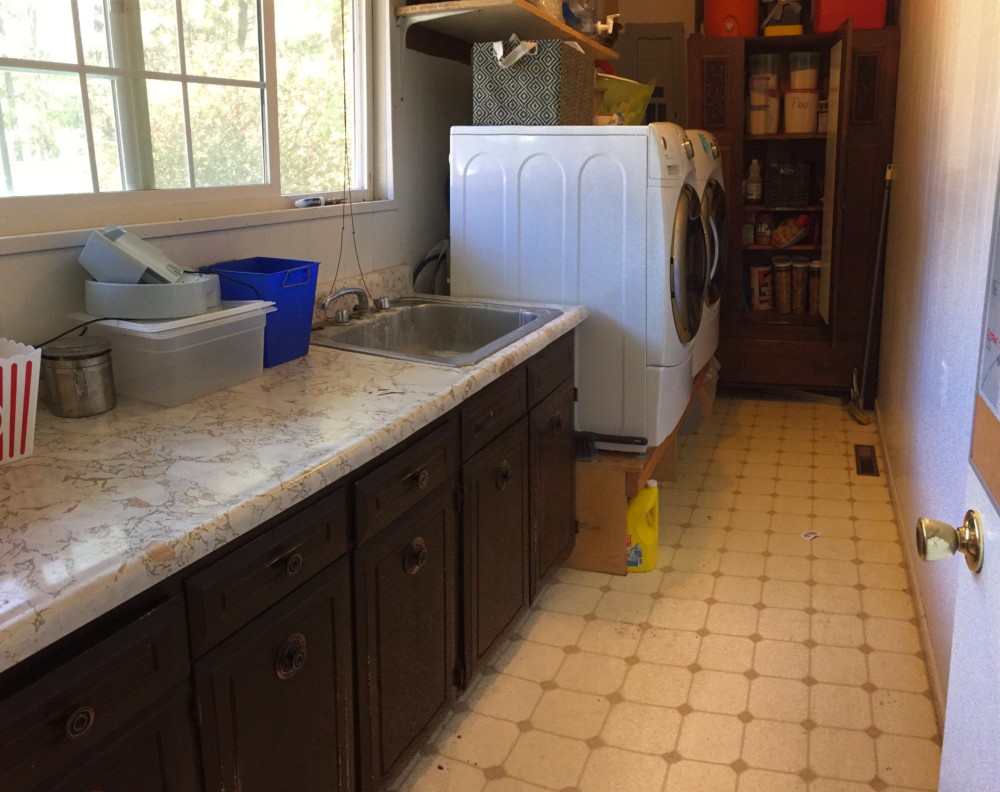
Collect some pictures for inspiration. I actually stumbled across my dream laundry room in a magazine while in a waiting room. A link to the article is in the Resources section. Also, search for solutions to your unique issues. Just use your search engine and see what pictures come up. You will be amazed!

Click here to follow my Pinterest board: https://www.pinterest.com/jennyrossomorin/organized-laundry-room/

  1. Ideas to make it easy for the kids:

    First, train them how to do their own laundry. A little bit of training will save you hours of work later on! Try having a basket for each child’s clean laundry. Also, have a laundry sorter. Label it whites, darks and mediums as a guide. On the wall by the washer, I have a sign telling what temp different colors get washed in so they can do their own laundry with confidence. To make it easy, I have the laundry soap sitting on the counter beside the sink so everyone can reach it.

  2. Decisions, decisions

Yes, you must decide level of organization you want. Open shelves or closed cupboards? Decide how many bottles of detergent you need, how many cleaning cloths. We end up storing some of our lightbulbs and other cleaning supplies in our laundry room cabinets. But if I buy too many as a “backup” they will end up overflowing. So be careful of that!

How many towels, rags, etc. Do you have a place for everything that needs a “home” If not, create one.

6. How much time are you willing to spend organizing your laundry room?

This is going to be different for everyone. If you have plenty of time and the right skills, DIY is a good idea. If time is short, and/or you’d rather have a tooth extracted than organize, seek help from a professional. Many professional organizers have a good eye for design or know a good designer, if you want some advice there.

If you follow these instructions and still need more help, or get stuck, or if you need more than just You on the job, consider hiring a professional organizer!

Resources:

Click to see more great ideas on Pinterest: https://www.pinterest.com/jennyrossomorin/organized-laundry-room/

To see the article that originally inspired me: http://www.goodhousekeeping.com/home/organizing/tips/a25464/organized-laundry-room/

Pack ‘em up and move ‘em out!

We are leaving for Disney early next week, and I have some tips for packing up a family for a road trip or flight to somewhere warm and sunny!

I have different lists depending on the destination and time of year. For Spring break, I figure most families are going somewhere warm like Mexico or Southern California, so I’ll go with that.

Tips to make Packing for family vacation easier:

  1. A day or two before the trip, catch up on laundry and make sure all the clothes you want to bring are clean.
  2. The day before, go shopping for any special trip food/supplies you need.
  3. Sit down and make a comprehensive list of everything you think you might need. If you’re going on a road trip, you can bring a lot more than if you are flying.
  4. Check out this link for the Fly Lady packing list. This is a comprehensive list of everything you might need on vacation. What I did was copy it, personalize it to me by taking out the items I don’t need.  My list is at the end of this post.
  5. Moms: pack for yourself first. At least pick out your clothes, lay them out on the bed and pack your ditty bag with all your toiletries. Then your mind will be more clear to pack the rest of the family.
  6. Make a “kid list” so each child over 5 can pack their own things. Before my kids could read, I would make them a list with pictures. 4 shorts with a picture of shorts, and 4 t-shirts with a drawing of a T-shirt, and so on. I’d have them put their clothes on the bed then we would go through them together so I could make sure everything was clean! (At least we started out with clean clothes, right?) The fly lady has a printable list on her site. http://www.flylady.net/i/pdf/packing_coj.pdf
  7. Ask one of your older, organized kids to pack the food for the road trip, (or snacks for the plane) according to a list you provide. That way, you just have to answer questions about amounts, etc. Don’t forget water!
  8. Ask your husband/wife to gather the sports equipment, camping supplies, whatever they are comfortable with packing. One job my husband loves to do is actually pack the back of the van as tightly as possible. It’s like a fun challenge for him to see if he can fit everything without it falling out when we open the back hatch.
  9. Emergency supplies: One thing easily forgotten, but when you need it, you need it! For plane rides, I usually bring antibiotic ointment, bandaids, ibuprofen and Dramamine. If you are on a road trip, a bigger first-aid kit is a good idea, with an instant ice-pack, ace bandage, large bandages, moleskin, a bandanna, safety pins, etc.
  10. Don’t forget your dressy clothes! And your dress shoes—I don’t know how many times I brought my dress but forgot heels! A great tip for families with young children: put all the family’s dress clothes into one duffel bag so the kids don’t wrinkle them up while rifling through their bags for other clothes.

Fun day-trip destinations on the West Coast:

  1. Try out horseback riding on Bandon beach. I went last year, and as long as you can pick your day (wait for sun!) it is a lot of fun. http://thebandonguide.com/horseback-riding-on-the-beach
  2.  How about crabbing? The Oregon coast is a great place to try crabbing as a family, then enjoy the catch of the day! bestfishinginamerica.com/or-crabbing-bays-in-oregon.html
  3. Hike to a waterfall. In springtime, the waterfalls are amazing. Be prepared to get wet!  http://www.oregonlive.com/travel/index.ssf/2015/04/oregons_best_waterfalls_for_sp.html
  4. Try out Bend for a couple days. Ski Mt. Bachelor and check out the artsy downtown area loaded with good restaurants and some music venues on weekends. For families that don’t ski, the lava tube caves are a great way to get underground. You can literally walk fully upright in the lava tubes for a mile! I’ve done this with my family and we loved it. Definitely the biggest cave I had been to. No claustrophobia at all!
  5. Easy day trip in Southern Oregon: The Oregon Caves. The temperature stays pretty even year-round. About 50 degrees. These caves are made of marble, and are loaded with stalactites and stalagmites. It’s a must-see if you live in the area. https://www.nps.gov/ORCA/planyourvisit/index.htm
  6. Mammoth Beach, CA. Imagine the Swiss Alps transported to California. This is what Mammoth looks like! It’s a great choice for a couple days of skiing. Snowshoeing and natural hot-springs are other adventures to be had in this beautiful spot.  http://www.sunset.com/travel/family-vacation-ideas

My adapted Fly-lady packing list:

A couple weeks before the trip: ask neighbor to bring in recycling, newspaper and mail, and arrange pet care.

CLOTHES

  • ____changes of clothes in carry on chargers
  • ____sets of underwear (underpants, socks)
  • ____sleep shirts/pjs laptop, charger
  • ____dress outfits (pantyhose/tights)
  • ____shoes (sneakers, sandals, dress, slippers, boots)
  • ____robes (swim cover ups)
  • ____special sports wear (tennis, golf, skiing)
  • ____swimsuits
  • ____swim towels
  • ____goggles,
  • ____sweaters, sweatshirts
  • ____jackets or raincoats
  • ____ dress shoes

TOILETRIES

  • ____toothbrushes
  • ____toothpaste
  • ____deodorant
  • ____hairbrush, comb
  • ____shampoo
  • ____kids’ shampoo
  • ____ elastics
  • ____lotion
  • ____bugspray
  • ____sun block
  • ____medications
  • ____nailfile
  • ____shaving kit
  • ____make up bag
  • ____nail clippers
  • ____Super absorbent hair towel
  • ­____ candle, matches
  • ___ Mom nightstand bag
  • Mom toiletries: ___Pillow  ___Mp3 ___mask   ___toothbrush charger       ___nail clippers ____shaving kit  ___medicines  ____makeup  ___vitamins

MISC

__Money belts           ____passport copies

  • ____sleeping bags
  • ____cell phone, cord,
  • ____chargers
  • ____MP3 CHARGER
  • ___ CAMERA, charger
  • ____ Camcorder, charger
  • ____Pillows, u-shaped pillows
  • ____books, magazines
  • ____stamps, pen, paper
  • ____sporting equipment:
  • ____map(s) , directions
  • ____RESERVATION FORMS, RESERVATION #
  • ____resort information
    •        MOVIES
    • ____GAMES
    • ____extra batteries

 LAST MINUTE

  • ____feed, water pet
  • ____turn on porch light, set timers
  • ____water plants
  • ____check doors, all appliances off
  • ____turn down heat/air conditioning
    • ____large garbage bags for dirty clothes

Kids: Special blankets or stuffed animal  ___   Books____

Activities for plane ride

  • Something to draw with. Colored pencils or crayons.
  • Notebook
  • Erasers, pencils
  • Candy, snacks
  • Juice boxes

Other:

Hats, sunglasses

Voice recorder

Journal/notebook

First aid kit

Book lights

Playing cards

Plane survival kit:

Gum, eye drops, Mask, comfy pants, earplugs, mp3, headphones, book, handicraft, Compression socks and foot rest, seat cushions, light blanket

Productivity Secret: It’s not Sexy, but it’s Smart & Savvy!

Q: When an organizer procrastinates, what will she be doing?

A: Organizing her desk or her closet.

We are one month into the new year. You are still feeling the energy to make changes in your office, but maybe not quite sure how to start. I am here to help!

The Urge to Purge

A project I love to do at the beginning of the year: cleaning out my office files to start fresh for the new year. My friend Susan McKenzie, who is a feng-shui designer, tells me when you make room for new clients they will come. You have to allow some space in your life for new opportunities.

I know it’s not sexy, but we all need to do it: the file purge. I have been feeling the urge to purge these last few weeks. It’s true that when files move freely in the drawer, it is much more likely that I will file my own paper. I know 
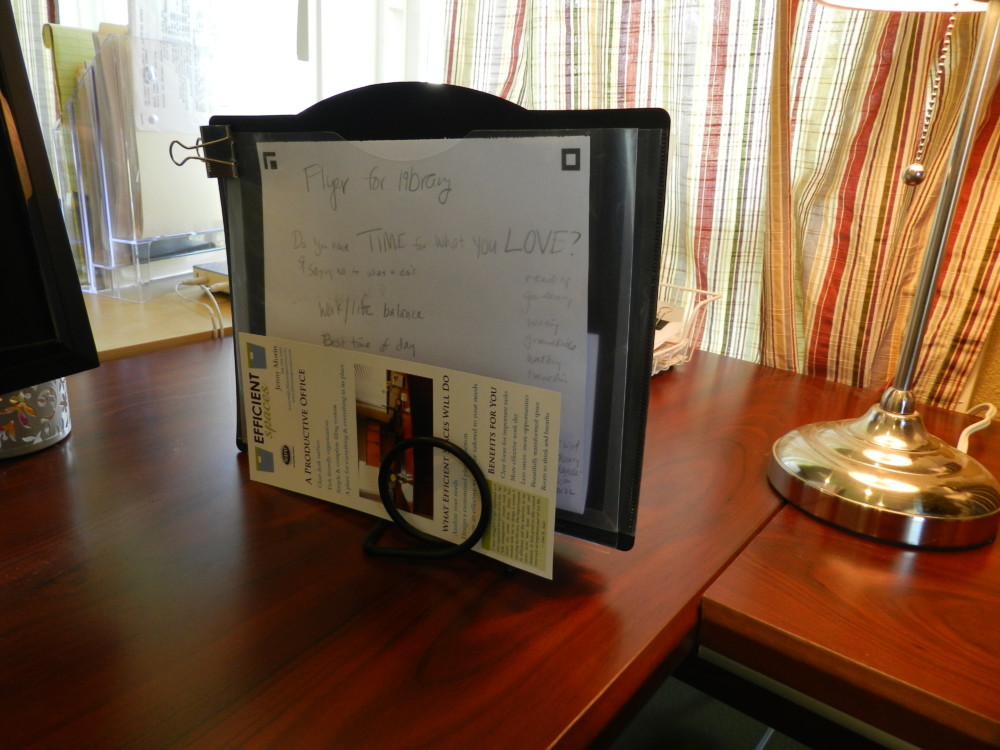
it works with clients too; they always want to use their new and improved file system after we have set it up. It gives me great satisfaction to know I’ve helped yet another person to be organized and find what they need quickly.
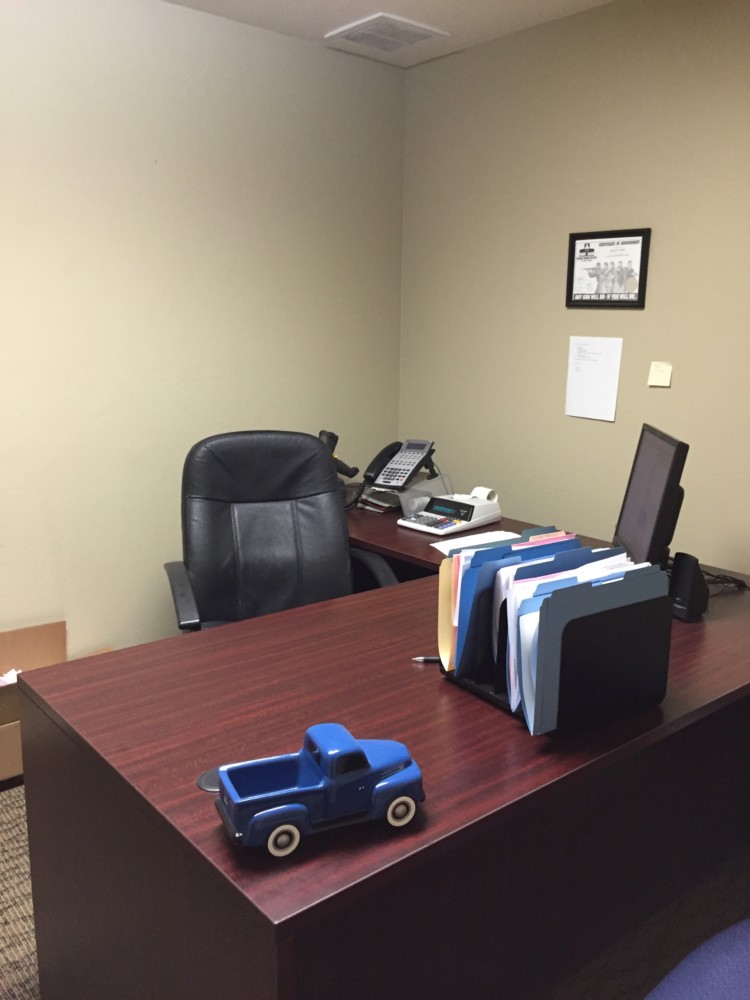
Sit back and envision a filing system where your files move freely and easily, you can see each file tab with the topic or category, and easily slide papers into their proper place? Even better, when you need information FAST about that client you spoke with last week, instead of frantically searching through the papers or notebooks or Post-its cluttering your desk, you will know exactly where it is and be able to quickly review the conversation. Talk about reducing stress!

How to get from where you are today to that level of organization, though? There’s no secret formula. And I don’t have a magic wand to whisk away the clutter. Just elbow grease!

Like I said, not sexy, but purging does wonders for any surface, any drawer, any home or office.

From Piles to Files

Now, when I work with a client I think of myself as a clutter counselor. I am coaching each person to decide what to do with their clutter. Training him/her on what to do with each piece of paper. Sometimes it is slow going at first, but after a little bit they get to the point when they see, say, an insurance document similar to one we’ve come across before, they know if they should trash it or file it. Of course if there is any doubt, I am there to guide them. Along the way, we are constantly setting up new files.

A recent client Southern Oregon needed some help with her home office. Her life was so busy, she did not have the time to set up systems for the different businesses she and her husband own.  She did have some great files set up, but an unskilled assistant filed things in weird places. So ‘Abby’ could not find them. Once we set up systems to keep her desk free of clutter, and went through her files, she breathed a sigh of relief. Now she knows that everything is within reach, and that she will find what she needs quickly and easily.

So as a clutter counselor, here is some free advice: a large percentage of papers you file never get referenced again. Think hard about whether you will ever look at that information again.

Purging

Ask yourself these questions:

  1. Do I use this?
  2. Will I ever need this information again?
  3. If so, is there somewhere else I can get it?
  4. Will I remember where it is; does it fit in the category it is filed under?

This brings me to what I call file laziness. Instead of creating a new file for a new kind of information, you talk yourself into believing you will remember you filed your Notes on a new client inside the receipts file. You may think ‘I’ll just put it here for now; it’s only a couple pieces of paper. It’s not worth creating a new file. I’ll remember I put it here!’ If any rationalization is going on inside your head as you file it, stop right away, pull out a new hanging file, label it.

To prevent file laziness, I keep a hanging file in the very front of my most-used drawer, with plastic tabs and white file labels inside. New hanging files sit just behind it. This makes it easy. Then I am bound to use these when I need a new category or add a new client. You see, since I made it super easy for myself, I will create that new file when I need it instead of misfiling something or combining it with info it has no business being combined with.

So start the year off right with purging your files! You can pace yourself and just take 4 files a day or even 1 a day to go through. It will be worth it! You’ll be able to see labels clearly, file and retrieve your documents easily! Opening your file drawer will give you satisfaction instead of dread.

And if you need help, just call on me!

Please let me know if this post helped you! Click on this link to my FB page: http://www.facebook.com/OrganizingAttics2Basements/?pnref=lhc

Link to designer Susan McKenzie’s website: http://suemac2.houzz.com/

Workshop: Get Back in the Game

Create your Life Vision  & Fitness Plan for 2017

January is here, and it’s time to get back in the game!

Date:      Wednesday, January 18 from noon to 2 p.m.

Location: True Juice, 124 NW ‘D’ Street, Grants Pass. Bring lunch or order one here.

Cost:       $20 for this AMAZING  2-hour workshop! 2 for 1 offer: bring a friend and each get both workshops for $10! If you come solo and want just one workshop, it’s $10.

Speakers: (at 1 pm) Jenny Morin, Organizer & Coach; (at Noon) Doranne Long, Physical Therapist.

  • Get clear on your burning desire & VISION for 2017
  • Learn 5 steps to SUCCEED with your goals
  • Get INSPIRED for the year & start your vision board                                                      
  •  Get a copy of  Get Organized Quick! Price: $7.99


From Doranne:

  • Use it, don’t lose it
  • Less pain, more FUN!
  • Better physical, emotional, mental and spiritual HEALTH


Get a copy of  Your Body Book!    Price: $ 16.99

Magical Mornings

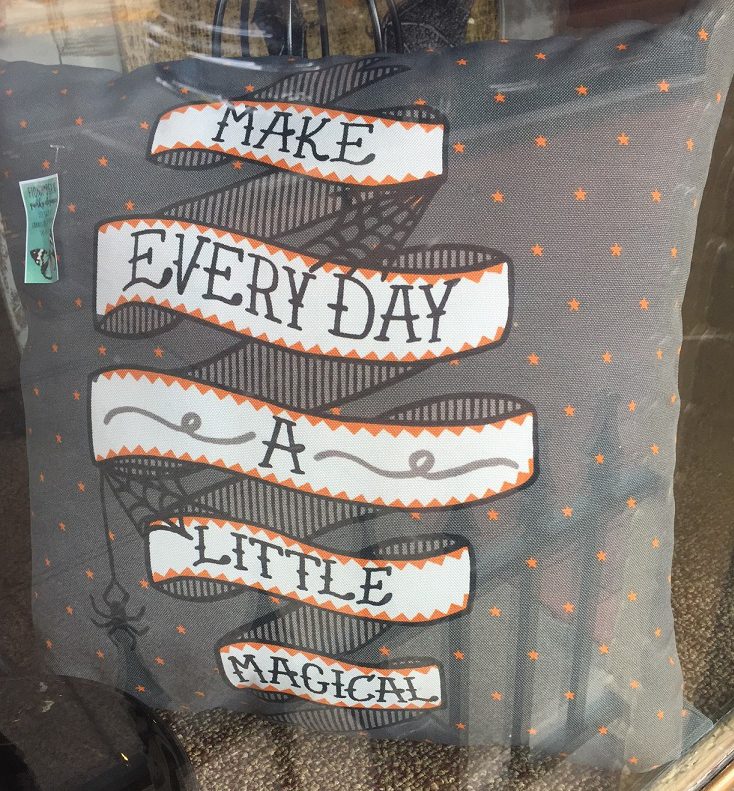
“Have a magical morning!”  is what we heard every day when we entered Disneyworld. Today, I have some tips to make mornings flow.

How can you avoid the mad dash that happens every day as you get the kids or yourself out the door? It’s stressful most days, and it feels rushed and frantic.

We all know the basics, eat a good breakfast, pick out an outfit, get dressed, and, if you get up early enough, exercise.

What about the other stuff? How can you prepare yourself for the day and get the kids, yourself and your spouse out the door without the mad morning scramble?

Tips for Magical Mornings

  1. This really helps . . . Get up before the rest of your family, even just 15 minutes. I know, I know. It doesn’t sound inviting, especially if you are tired right now. Trust me; it is worth it.
  2. Take time to pray or meditate.
  3. Do some stretches while listening to scripture or an inspirational book.
  4. Get showered if possible and DEFINITELY do get dressed for your first activity before you wake up kids—this really helps. As one of my clients said, when her kids were young, she would get dressed from her head to her socks before she woke her children up, and it really helped her feel put-together.–it’s ok to wear your slippers! Also, it reinforces the habit of taking care of you before taking care of others.
  5. Make a quick plan for the day: what’s for dinner, what’s your #1 priority for the day? Take out whatever needs to thaw for dinner. For quick and easy meal ideas: find it here.  https://efficientspacesco.c.wpstage.net/2016/07/cool-easy-summer-salads/Link to my Pinterest board Easy dinners: http://www.pinterest.com/jennyrossomorin/easy-dinners/
  6. Now you are centered and ready to wake up your spouse and/or children and greet them with kisses and smiles.
  7. And last of all, go to bed earlier. Allow yourself at least 7 hours to sleep and you will awake refreshed and ready for the day tomorrow.

Now go put in a load of laundry. Yay!   Don’t forget to plan when to take it out too. Start a habit for when to transfer the clothes to the dryer… or you’re gonna have to re-wash it tomorrow.

If you do forget and need to rewash, I’ve done some research and experimenting. The best way to get the in-the-washer-too-long smell out is by putting a half cup of baking soda directly on the clothes, then rewash. Detergent not necessary.

And don’t beat yourself up if you cannot manage to wake up earlier one morning.  The routine here is the ideal. If you only have 15 minutes to get yourself ready on any given day, you’ve got to prioritize and pick the activities that are most rejuvenating for you in the morning. ALWAYS do #4, though. It will make you feel better, more put-together.

Bonus: Tips for Getting kids’ stuff ready the night before

  • Make sure homework is done
  • Backpacks loaded with homework, lunch money, permission slips, etc.
  • If your child tends to dawdle over getting dressed, have them pick out an outfit in evening. Better yet, have them pick out 5 outfits on Sunday!

Good Questions to ask kids before they go to school:

Do you have everything? Lunch money? Time they need to be picked up? Who’s picking them up? You, a spouse, or an older sibling?

What activities do they have in the afternoon/evening: remind them and yourself.

I promise, when you follow these tips, most of your mornings will be calm, less stressful, and yes, even MAGICAL!

Easy switch to Fall clothes for kids’ rooms

Make purging Quick for kids

Today, I got frustrated with my 11-year old’s room. Jacob is a typical boy, with lots of different interests. Sports, video games, TV, rocks, toys. Clothes are not one of his interests. As long as he has a t-shirt to wear and some shorts (clean or not) he is good to go.  So every day before school I inspect his clothing to make sure he doesn’t shame the family by wearing a T-shirt with ketchup stains on it to school.

Yesterday, I found a bag of Kyle’s jeans (he’s 16 now) that I had saved for Jacob, which were in the top of my girls’ closet. (The boys had been in the room the girls now use, so I must have just left them there when we made the switcheroo.)

With the purged clothes bagged up, Jacob’s room looks great!

Mid-project with all the clothes on the floor looks messy.

That is what inspired me to get

Jacob’s room in shape. I had him do a “fashion show” to try on the jeans and show me which ones fit.  I sat in the hallway  and folded laundry because I really dislike waiting time and the laundry always needs to be folded. (It never ends, does it?)

Turns out, only two pairs of the jeans fit him, so we put the ones that didn’t fit in a pile. On his own, he took the long pants that were too small out of his drawer and added them to the pile, which I had placed outside his doorway. That is one of the tricks I use when organizing: Get the stuff as close to its destination as possible. If it isn’t going to end up in the room, put it outside the doorway in a box, bag or pile. Then, as soon as you’re done sorting, take it and put it in a designated “giveaway” zone in the garage or, even better, in the trunk of your car.

Next time you pass a thrift store, take 5 minutes and donate it. It’s a great feeling for me because I like to know my things will get used by someone who may desperately need them. And if you’re into recycling, this is the ULTIMATE recycling!

Next, I moved to the shirt drawer. By this time, he was asking to go play a video game with Dad. I told him once we went through his shirts he could. So he speedily put the shirts that were too small in the growing pile. Some of them were designated “PJ” shirts because they are ratty but he still loves them. Then I looked at the shirts (because he frequently puts things away when they need to go into the wash) and sorted the dirty ones into a laundry basket. (I still have not learned how to get him in the habit of putting dirty clothes into the laundry bins, which are literally 6 feet from his bedroom door.)

As I sorted, I put the long-sleeved T’s in a separate pile, because I’d decided to place them in a basket in his closet since he’s not wearing them yet. That seemed to work well. We put his painting/work clothes in another basket there.

So how long did it take us? 30 minutes.

The other drawers didn’t need attention because they are not overflowing, so I moved to the laundry, where I put stain stuff on all the shirts. In some cases, I needed to use Lestoil or Kiss off on the grease stains. Lestoil is for any oily stain, but it smells really bad. Kiss off comes in a stick, and is so powerful it can remove oil paint. (But you can’t leave it on the clothes more than 24 hours or it will bleach out the stain and the fabric color.)

So, once the laundry was started, I sat down and ate a homemade chocolate chip cookie.  It’s been a good day already.

Clothes switcheroo tips:

  1. Have the child try on the clothes that may be too small.
  2. Make it fun (play music, give small treats) or give them a reward to look forward to when you finish.
  3. Put any stained or ripped clothing in a giveaway bag or box.
  4. Separate dirty clothes into a laundry basket.
  5. As kids grow, their clothes get bigger. If they need more room than the drawers or closet provides, add a basket or a set of opaque plastic drawers to the room. Utilize under-bed space using an under-bed box for off-season clothes.
  6. Put the remaining clothes, the “keepers,” in drawers.
  7. Take your giveaway container to the garage or car trunk and drop it off at a thrift store this week.

Another option for donating: See if your community has a resource which  provides free clothing to needy families. In Grants Pass, we have the Campus Closet, which gives clothes to kids age 5 to 18. It has moved locations from North Middle School to:  The United Community Action Network building: 125 Manzanita Ave. Check the district 7 website for hours. http://www.grantspass.k12.or.us/Page/2873

They are open selected Wednesdays from 4 to 7. Campus closet Facebook page: www.facebook.com/Campus-Closet-121572287883293/

See my Pinterest page for organizing toys http://www.pinterest.com/jennyrossomorin/organized-kids-toys/

Ideas for organizing closets: http://www.pinterest.com/jennyrossomorin/organizing-your-closet/

1 2 3 4 5 6 7
Privacy Settings
We use cookies to enhance your experience while using our website. If you are using our Services via a browser you can restrict, block or remove cookies through your web browser settings. We also use content and scripts from third parties that may use tracking technologies. You can selectively provide your consent below to allow such third party embeds. For complete information about the cookies we use, data we collect and how we process them, please check our Privacy Policy
Youtube
Consent to display content from - Youtube
Vimeo
Consent to display content from - Vimeo
Google Maps
Consent to display content from - Google
Spotify
Consent to display content from - Spotify
Sound Cloud
Consent to display content from - Sound
Schedule a Free Call